Monday, September 28, 2009

CSA Monday! Watermelon Edition

I walk to pick up our CSA. Let me tell you...walking a mile with a watermelon in your sack is not fun. But thanks to the glorious fall-ish weather, I didn't break a sweat! The jerk chicken from last week was good. The jerk seasoning was also nice on the sweet potatoes. I really like to spice up my sweet potatoes. When I make sweet potato fries I usually add chili powder.

The Haul:
Watermelon, huge zucchini, cucumber, Italian basil, Thai basil, huge sweet potatoes, garlic and lettuce mix

The Plan:

Spicy Vegetable Red Sauce with Pasta: Basically, I'm just using of the squash and eggplant from last week that I shamefully didn't get around to using along with the mammoth zucchini from the week. Add in some garlic, onions, crushed red pepper and a can of tomatoes and it's good eatin'. For an army.

Ham Feast: Roasted sweet potatoes, ham and Southern-style greens spiked with cider vinegar.

Kra Pow with Bok Choy: To use the Thai basil. And hot peppers from the garden. This is the husband's lunch.

"Greek" Watermelon Salad
: Maybe for this weekend's lunch? Sounds interesting.

Watermelon Rind Pickles: If I've got the time, maybe something else I'll give a whirl this weekend. I've never had them, but love all things pickled.

Saturday, September 26, 2009

Putting Up: Green Tomato & Apple Chutney

Believe it or not, my Sungolds are *still* producing. Slower, but I still get about 1/2 a pint of ripe cherry tomatoes per week. This weekend, I gleaned the garden. With the crispness of fall in the air and chilly nights I just feel like it is time to pull those babies up. May they RIP.

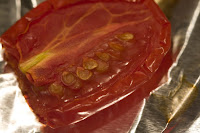
I oven-dried the ripe tomatoes (a whole tray full!) but what to do with the green tomatoes? I got inspired by Gradually Greener and decided to make a green tomato chutney. However, I don't have fig jam to use as a base.

Below is a recipe I found online but I've tweaked it to volume rather than weight which I think is probably more easy to follow. If you're going to can this, follow to ratio of tomatoes/onions/sugar/vinegar/etc. closely. You can certainly vary the spices but this is pretty darn good! If you aren't up for canning, freezing would work too.

Ingredients
5 c green cherry tomatoes, halved (about 2 1/4 lb)
2 Granny Smith apples, diced (about 1 lb)
2 medium onions, sliced
4 c cider vinegar
2 c brown sugar, minus 2 tbsp
1 c raisins
1.5 tsp mustard powder
1/4 tsp ground cloves
1 tsp ground cinnamon
1/4 tsp cayenne pepper

few tsp of oil

Directions
1. Heat oil in a pan. Add onions & caramelize.
2. Next, add the rest of the ingredients and bring to a boil. Lower to a simmer and cook for 45 min (up to 1 hour) or until thickened into a sauce.
3. If not canning, cool and either freeze or place in fridge.
4. If canning, boil jars and lids for 10 minutes. While still hot, pour in boiling chutney, place on lids (with fresh seals) and put back into the boiling water bath for 20 minutes. Let cool for 8 hours and check seals. Those that are well sealed, put up. Those that aren't, put in fridge and eat soon.


Makes 3 pints. Use this with roasted pork or chicken or with cheese and crackers. Or give as a holiday present to coworkers or a hostess gift for Thanksgiving (this would be fabulous with a good roast turkey).

Enjoy!

Friday, September 25, 2009

Recipe: Spiced Grill GTG

This past weekend the husband & I hosted a party. It's not quite so hot now and bugs are *almost* non-existent, so how could you not? Especially since our house is the size of a tin can so if we want to have people over it's best to do it when we can all be outside.

Here's the menu:
Iced tea
Tinto de verano

Cumin-cilantro turkey sliders
Salmon burgers

Mustard-y slaw
Baked beans

The recipes:

Tinto de verano
I had this in Spain where it's surprisingly difficult to find sangria. This is just as tasty & far easier to throw together.

1 bottle of temparillo, chilled
1 L 7Up or Sprite, chilled
lemon slices, optional

-Mix all ingredients in a pitcher and serve, chilled. (Yes, that's a lemon-lime soda in wine. Yes, it's good and I *promise* they use that in Espana. Use cheap wine though. Trader Joe's has a nice one for $3.99. I call that "party priced")

Cumin-cilantro turkey sliders

1 lb ground turkey
1/2 bunch of cilantro, finely chopped
salt & pepper
1 Tbsp ground cumin
1/4 c Panko breadcrumbs
1 egg, beaten

Rolls
Condiments/toppings (I did garlic-chipolte mayo, salsa, ketchup, lettuce, slice red onion, hot peppers, and banana peppers available).

-Mix first group of ingredients, working as little as possible.
-Form burgers into patties & grill until cooked through. Put on bun & top as desired. :)

Salmon burgers
This is another recipe from my grandmother that I've tweaked a bit. Again, this recipe was born in the 1950s so canned salmon is called for. Yes, you could probably use cooked fresh salmon, but I find canned to be convenient and you can get wild Alaskan for cheaper than you can get fresh. It's a great way to incorporate more oily fish if you're on a budget. Plus, it's an easy pantry meal. Makes about 4 normal-sized patties, 8 slider-sized.

1 can wild Alaskan salmon, drained and backbone & skin removed
1/2 onion, finely chopped
zest of 1 lemon
salt/pepper
1/4 c oatmeal
1 Tbsp flour
1 egg, beaten
hearty pinch of cayenne pepper

-Mix all of the ingredients together. You should be able to form patties that hold together. If the mixture is too dry, add a bit of milk. If it's too wet, add more oatmeal or flour.
-Once your patties are formed, heat a bit of oil in a frying pan. Cook patties on both sides until brown.
-Drizzle with lemon juice. Serve on a bun with fixin's if you want or eat as is (which is what we often do)

Mustard-y Cole Slaw

A Cooking Light recipe (linked above). The only change I made was to use cider vinegar instead of white, just because I prefer it.

Garlic-Chipolte Mayo
I love this condiment. It's kind of a no-recipe, recipe. Basically take about a half of cup of your favorite mayo and add a finely minced clove of garlic and 1 (or 2!) finely minced canned chipoltes (The kind in adobo sauce. You can freeze the leftover peppers for later). Let the mayo mix sit in the fridge for a few hours before serving.

Wednesday, September 23, 2009

Raising Winter Greens

I attended the DC Urban Gardeners/Washington Gardener Magazine/DC Historical Society session on raising winter greens presented by farmer at Even' Star Organic Farm, Brett Grohsgal. The husband tagged along.

It was really informative! And entertaining.

Here is what I learned (or was reminded):

  • Your soil is your biggest investment in the garden.
  • Veggies, on the whole, like to be well-drained.
  • Snow? Not a problem. Iced over snow? Also not a problem. Freezing wind? Big problem.
  • DO NOT plant greens in late August. (ah! My procrastination paid off!) The bugs will eat your little sprouts before they can have a chance. Best to plant greens in late September.
  • Good fall crops for this area are: arugula, mustard, turnips, collards, kale and radishes. Lettuces, dandelion and raddicchio can be successful as well.
  • Chinese Thick-Stem Mustard is apparently pretty good.
  • Southern Expsoure Seed Company and FedCo are good seed companies for this area.
  • Rules of Raising Winter Greens in DC Area:
  • Sow Sept 3-Oct 15th
  • Water frequently (to get good roots. Every 3 days unless it rains)
  • Thin when seedlings have 6 leaves
  • Fertilize using fish emulsion, 1/2-3/4 strength
  • Use leaf mulch to insuluate
  • Channel 7 has the best forecasts
  • RADICAL Winter Planting: If you dare....
  • For lettuces, peas, carrots
  • Work AS SOON as the ground has thawed enough (there's generally a freeze-thaw-freeze cycle here)
  • January 28-March 15: Direct sow crops. High mortality rate so plant lots
  • This doesn't work very well for braassicas or transplants other than onions & leeks.


100th Post!

Here's where it all started: What I'm Reading

The promise of spring, indeed! Now I'm successfully grown plants from seed, build raised beds, harvested hoards of home grown tomatoes, almost finished my CSA, and learned so much in the process.

These days I'm reading Botany of Desire and Safe Sex in the Garden (about allergy-free gardening. Get your minds out of the gutter!).

Monday, September 21, 2009

CSA Monday! *Honey* Edition

I'll admit it: I'm getting a bit burned out on summer vegetables. The thing I'm looking forward to most with dark, leafy greens and root vegetables. But, today's the last day of summer so it's fitting I'm still getting summery goodness plus a healthy dose of liquid gold.

Here's the haul:
sweet potatoes, honey!!!, summer squash, corn, cucumber, eggplant and lettuce.

The Plan:
I'm going to put up the squash and eggplant by grilling and then freezing them. I really can't fathom eating more squash or eggplant or tomatoes right now. Seriously.

Salad for lunch

Mark Samuelsson's Jerk Chicken: The husband is going to make this. The recipe in our cookbook calls for roasting the chicken over sweet potatoes and parsnips. Will serve this with some pikliz.

I'm also going to make a double batch of split pea soup this weekend and go apple picking (so some appley and honey-y desserts may take place).

And...um...that's it. We've been pretty lame with our meal planning lately. Sorry guys!

Mark Your Calendar!

Fall can be a pretty slow time in the garden, especially if you aren't growing winter vegetables. You may want a bit of a break from harvesting and gardening or perhaps you'd like a little something to hold you over until spring.

Lots of goings on for fall round these parts:

Edible Gardening/Food-related:
At Brookside Gardens (Wheaton, MD)-
Sept 21, 7:30pm: Growing Fall Edibles

At US Botanic Gardens (aka USBG. DC)-
October 3, 1pm: Chocolate, A Consumer's Guide & Tasting

At Merrifield Garden Center (near Falls Church, VA)-
Sept 26- Intro to Cooking with Fresh Herbs

Ornamental Gardening-Related:
At Meadowlark Botanic Gardens (in Vienna, VA. Cost= Admission to gardens)-
October 3rd 10 am: Propagating and Growing Salvias
October 4, 2 p.m:
Tour of the Potomac Valley Native Plant Collection
October 10, 10 a.m: Ornamental Grasses Tour
October 17, 11 a.m. to 3 p.m.: Re-blooming Iris Fall Show


At USBG-
Sept 26, 1pm: Tour of National Garden

Garden Photography-Related:
At USBG-
October 9, 6:30 pm: The Power of Natural Light

Other suggestions Food/Gardening-Related:
Go apple picking
Visit the National Arboretum
Plant spring bulbs
Watch Botany Desire (a GREAT book by Michael Pollan) on PBS on Oct 28th. Preview here.

Friday, September 18, 2009

Early Fall Garden Update

I was super duper lazy with my fall planting. Next year I think that I'm going to need to do my fall garden plan and plant dates in the winter so that I take out any possible guesswork/thinking. Fall is a busy time at work so I just don't have time to sit around and think about the garden; fall is the time for going on auto pilot!

So, on Labor Day (yes, I'm also slow with the posting) I threw down some radish, carrot, kale, mustard and arugula seeds along with planting some starts of kohlrabi and kale starts from Merrifield. Thus far the mustard greens (pictured), radish and mustard have sprouted.

Also, our Sungolds are *still* producing. It's insane. And the Thai Dragon and Kung Pao peppers are also going nuts.

Anywho, there you have it. Hopefully in a few weeks we'll be feasting on some fall veg.

I still need to plant some garlic and onions, though. But here's part of the garden so far (those are radishes in between the kale & kohlrabi):

Thursday, September 17, 2009

Garden Planning Program

Interesting.

I was googling for classic designs of herb gardens and came across GrowVeg.com. They've got a free trial (one that you don't have to fork over you credit card info for) so I decided to try it out.

The basic idea is that it provides a grid and a rather exhaustive list of vegetables, fruits and herbs (it also has info on growing each of these) that you drag & drop onto the garden area you've created. It's also got a crop rotation feature. Plus? You've got a record of what you've planted where each year. They also say that they will email you to remind you of planting dates.

Now, I did this by hand last year, but kept changing my mind & had to redraw the garden area each time as well as draw back in the stuff I wanted to keep (or I could have drawn in pencil. whoops).

I'm not sure that I'll covert to GrowVeg.com (the subscription is cheap at $25/year) but it's certainly something to keep in mind...

Tuesday, September 15, 2009

Recipe: Roasted Harissa Veg Couscous Salad

What to do with 1 zucchini, 1 crook-neck yellow squash, 1 eggplant and 1 small pepper when it feels fall-ish outside?

Predictably, my mind immediately went to roasted vegetables. But, um, that's kinda boring, ya know? Not when you roast them with red onions and harissa! Harissa is a North African spice blend that includes chili peppers and garlic along with cumin, coriander and some other spices. It gives the vegetables a smoky, almost BBQ-like flavor.

Ingredients:
1 zucchini, cubed into bite-sized pieces
1 yellow squash, cubed into bite-sized pieces
1 eggplant, cubed into bite-sized pieces
1 small green peppers, cubed
1 red onion, in big pieces

olive oil
3 Tbsp harissa spice blend

1 box Israeli couscous (mine is from Trader Joe's)

Directions:
  1. Preheat oven to 425*F.
  2. Toss the vegetables in olive oil and harissa until thoroughly combined. Spread out on sheet pan(s).
  3. Roast for 20 minutes, stir & rotate pans, and roast for another 20 minutes.
  4. Optional: When the vegetables are done, turn off the oven & let the vegetables sit inside for a little bit of time (I let mine sit for hours.). This kind of dehydrates the vegetables a bit and concentrates their carmelized flavor.
  5. Meanwhile, cook couscous according to the directions on the box.
  6. When the couscous is done, toss everything to combine.
  7. Eat with roasted meats or alone as a warm salad.

Monday, September 14, 2009

CSA Monday! Two Weeks Edition

Gah, last week I was unable to do a CSA post here's last week haul:

I did a poor job of using all the produce as well. All the sweet potatoes we still have. Some of the tomatoes got used for BLTs and the others, well the ones that didn't go bad, were used this week. The zuc, squash and eggplant got put to good use for my lunch, Harissa Roasted Veg & Israeli Couscous (recipe to be posted soon). And the corn was left for this week too (bad, I know)

This week, I got:


Deja vu, no? There's basil (italian & thai), 2 gimongous sweet tomatoes, corn, tomatoes, 1 zuc & 1 eggplant.

The Plan:

3 Bean Corn Chili: Black, dark kidney and light kidney beans mix and mingle with corn (off the cob), tomatoes, hot peppers, onions, celery and spices. To top baked sweet potatoes. Probably half of this batch will be frozen for later.

Chicken & Eggplant Kra Pow: Like regular kra pow, but with eggplant added. Yum.


Misc:

Mark your calendars! Raising Winter Greens *free* talk this Saturday!!!! More info

Friday, September 11, 2009

Putting Up: Oven Dried Tomatoes

My Sungolds are still producing, although at a slower rate than before. And, we picked our final few Wonder Lights. Add in the few red tomatoes I got from the Farmer's Market and it all adds up to more tomatoes than we care to eat at the moment. Although I'm sure come December my tune will change.

I've already covered canning (I've put up 3 quarts!). Freezing oven-dried tomatoes is another idea on what to do with any tomato surplus you may have. Or, oven-drying is a great way to make faux sun-dried tomatoes for all your recipes needs!

Here's what you do:

1. Preheat oven to 300*F.
2. Slice sauce or even cherry tomatoes halfwise (big tomatoes don't work great for this). De-seed the bigger tomatoes.
3. Place tomatoes on baking tray (I line mine with tin foil for ease of clean up) along with olive oil and/or dried herbs (Optional. Note: Woody herbs work best.). Don't use salt though.
4. Bake for 45 minutes.
5. Turn off oven, but leaves tomatoes inside for 2-4 hours. They should be a bit flexible and a tad moist but have very concentrated flavor.
6. To freeze, just take the baking tray from the cooled oven & place in the freezer for a few hours. When the tomatoes are individually frozen, put in a larger ziploc bag.


I like using these in pastas and purple basil pesto as well as an earthy addition to beef stews, salads, sandwiches, etc.

Tuesday, September 8, 2009

Falls Church Farmer's Market

I'm probably going to kick myself later, but here it goes:

Falls Church Farmer's Market is awesome.

I used to be devoted to Eastern Market when I lived closer to it. I still like going there for all the arts and crafts but some of my favorite farmers aren't there anymore. The Court House Farmer's Market isn't bad (the berry people are awesome), but doesn't have a lot of selection. Then I discovered the Falls Church Farmer's Market which has tons of produce and meat vendors as well as local coffee roasters, sorbet/gelato makers, plant purveyors and bakers. Oh, and Virginia Master Gardeners to answer any questions about pests or plants you might have!

But mostly, I go to the Falls Church Market for this:
What is it? Only the most deliciously fantastic thing that will ever pass your lips: The chocolate-almond croissant. Perfect for those times when you cannot decide between a chocolate croissant & an almond croissant. Heaven. Check out the chocolate and almondy layers:
(This also probably includes an entire stick of butter. But that is why I walk to the farmer's market!)

There is lots of loveliness to be had at the market, but it gets pretty packed, so go early! I think I'm going to exchange our CSA for the farmer's market next year. I plan to expand our garden to cover most of our veggie needs but we will need to pick up a few things that we don't or can't grow.

Sunday, September 6, 2009

Recipe: Grilled Peaches with Minty Yogurt Sauce


Peaches are one of my favorite parts of summer. When they are good, they are heaven. When they are bad, they are like a mushy, mealy, flavorless mess. Blech.

At the Farmer's Market this weekend (more on that later), we picked up some fabulous peaches. You know the kind, peachy smelling as well as firm, but ridiculous juicy. In short: Perfection.

When you've got the perfect peach, it needs very little adornment, like, for example, a minty-yogurt sauce and honey to enhance its natural sweet and freshness. The following is a perfect dessert for two or...um...one me. :P


Ingredients:

1 firm ripe peach, halved
1/2 c plain yogurt (low-fat or full-fat, your choice)
3 Tbsp chopped mint (I used Kentucky Colonel)
2 tsp brown sugar
honey, for drizzling

Directions:
1. Grill peaches for about 5 minutes or until has grill marks and is slightly soften.
2. Mix yogurt, mint & brown sugar.
3. Top grilled peaches with minty yogurt sauce and a drizzle of honey.

Enjoy!!!

Saturday, September 5, 2009

Gardening: Not Rocket Science, Part 3

Alright. We've figured out some important details: light and soil. Moving on...

You want to look up your zone (USDA or if you're out West, I hear Sunset's zones are more helpful). Why? The important parts are the first and last frost dates as well as average high and low temperatures. The frost dates are what you'll live by if you're edible gardening. If you're planting perennials or shrubs/bushes, look for plants that can survive in your "zone" (meaning they can live with the high and low temps your area gets. you can still grow those that don't survive in your zone, but they will be annuals, not perennials for you).

Now, with the info I've droned on about, you can start making plant selection choices. I would advocate for the first time gardener to stick, at least most of the time, to the rules. This means, you choose plants that can deal with your light situation, soil situation and climate. When plants are in their ideal environment they are less susceptible to disease and pests which means you've got less maintenance and a greater chance of success. And really, not killing something feels awesome and is the surest way to encourage you to plant something else/continue to garden/make the garden bigger/etc.

I've blogged about the growing requirements for some edibles already to help you along: ground cherries, herbs, strawberries, peppers and tomatoes. Also, there are two notable inedibles in my life: my african violet and my Unwin's dahlias.

The boost of confidence, along with the knowledge that you can only really get by DOING something yourself will, in time, give you courage to plant something outside your zone or in a totally wrong light situation. In short, to experiment. After all, trying something new and taming Mother Nature seems to be what keeps gardeners excited about gardening for decades. But that first season? You need a little success. You need to be able to look around you and see things doing OK. You need to be able to think, "Hey! I can do this." And you'll realize that gardening isn't as hard or mysterious as you once thought.

Because, seriously, gardening isn't rocket science.

Friday, September 4, 2009

Gardening: Not Rocket Science, Part 2

Ok, so yesterday I blabbered on about sunlight.

Today? Soil.

In the immortal words from Fast Times at Ridgemount High: Learn it, know it, live it.

While you're monitoring the light situation, you can get better acquainted with your soil. As far as soil goes, it's important to know if it's acidic/alkaline or well-draining/moisture-retentive. If you container garden, you're in luck because you have the ultimate control over your soil and can perfectly adapt it to the plants you want to grow! Bagged, soil-less potting mixes tend to be slightly acidic, in general.

If you're planting in the ground you need to determine whether it's acidic or alkaline, you need to perform a soil test for pH. You can buy kits or you can send it off to your nearby extension office (they will do a more accurate, more thorough test and it's usually under $10!). A pH of 7 is "neutral." A pH less than 7 is "acidic" (to varying degrees) and a pH above 7 is "alkaline." Acidic is not necessarily better than alkaline for a garden. It all really depends on what you want to grow (although most plants prefer a pH between 6.2-7.2). Which is why it's handy to know what kind of soil you have.

Next, you need to evaluate how well your soil drains. Like acidic vs. alkaline, it's not necessarily better to have well-draining soil than moisture-retentive soil. It really boils down to the plants you'll ultimately select. Here's how to test the drainage of your soil: http://www.ehow.com/how_4543171_test-soil-drainage.html. If you're using a bagged, soil-less potting mix, it's generally considered well-draining, but make sure your container has adequate drainage holes!

Armed with this information you can either amend your soil to fit the needs of the plants you want to grow or go with the flow. I have, personally, have chosen a hybrid approach: I have worked compost into my moisture-retentive clay soil to help it drain better but have not changed the pH (mine soil is around 6.0-6.5). If you decide to go the amending route, take all the information you've collected to your nearest reputable nursery & ask an expert what you need to do.

If you're making a perennial bed, I would also suggest doing a NPK (nitrogen, phosphorous, potassium) test (which if you're getting a soil test from your extension office they will automatically do or you can get a home kit for it). This makes sure that you have adequate levels of nitrogen, phosphorus and potassium in the soil. If your levels are inadequate, your plants won't have all the nutrients they need to grow. This is important if you're planting perennials because you want them to last and won't be planting every year. It's best and easiest in the long-haul (or so I'm told) to just get everything right from the start. If you have inadequate levels, amend your soil (ask your local reputable nursery what you need to do).

Tomorrow? The final part of this triology: Plant selection.

Are you stoked yet?!?

Thursday, September 3, 2009

Gardening: Not Rocket Science, Part 1

Gardening seems so mysterious, doesn't it? I mean, you put a seed in some moist dirt and in a week or two, Voila!, you've got a baby plant. I suppose part of it is that humans don't exactly understand Mother Nature. I mean, sure, we can explain some things, but others? Complete mystery despite spending centuries of research.

So, of course, it's a bit daunting for the average person to go out there and try to tame Mother Nature in their own little patch of Earth/windowsill/patio/deck. There's the unexpectedness that is always a bit scary, as well as the "OMG, What If I Kill It!" fear and a dash of "This Seems Like Science & That is Not My Forte." At least, that's what I was feeling last year when I decided to give gardening, both edible and ornamental, a "go" after my container tomato and pepper plants didn't die (but also didn't exactly thrive). I guess you could say, after tasting my first backyard tomato, I longed for more.

I fully admit, I am still very much learning. I read magazines, blogs and books on gardening. I watch TV shows on gardening. I ask advanced gardeners lots and lots of questions. I volunteer at a greenhouse. I've taken free classes and attended lectures on various topics. And then, of course, I've done a bit of gardening myself.

After a yearish of all this, I think I can definitively state: Gardening is not as scary as it first seems.

I have learned that there does seem to be some basic "rules" to gardening. These rules almost guarantee success. And, much like anything else, after you have mastered this rules you can break them. But I'm getting ahead of myself.

I am still very much in the "rule-learning" stage. As far as I can tell, light and soil are the two most important things you need to know about your garden. Conveniently, you can find almost all you need to know about them in one weekend. I'm serious. The following text is very long and talks about a bit of science-y stuff, but I pinkie-swear it's not hard. And I double-dog dare you to try it. It's unfamiliar, maybe, but not hard. Just take a lazy Saturday at home and observe, every hour, how the sun hits your garden area. Write it down. As in:

8am: Full Sun everywhere
9am: Full Sun everywhere
.....
1pm: Right hand corner starting to get shaded by tree. Dappled light there
....
3pm: Right half totally getting dappled light, left half getting shaded by neighbor's house.
....
8pm: Totally dark
etc.

I've even heard of using an organic soil amendment like blood meal (although used coffee grounds would work too) to trace where you're getting shade in the garden as the day wears on. It's useful to note if it's a tree or building that is shading the garden area because in the winter, that area will get full sun if it's shaded by a deciduous (leave-losing) tree. If you want to be thorough, you could perform this exercise every season to see how the light changes in your space. This is probably particularly important if you have either lots of trees or buildings very close to your garden space. If you've just got a wide open field, it is likely less of an issue, you lucky bastard.

If you're indoor gardening, pay attention to weather your windowsill/garden area is getting DIRECT light or indirect light. Generally, direct light will make your hand cast a definite shadow whereas indirect light won't.

With this knowledge, you can determine which parts of your garden are full sun, part-sun or shade. And, yes, your garden area might have all three of those situations in one "space."

Remember that you can't change your light situation unless you knock down buildings or cut down trees. This is really the one thing about gardening that is permanent.

Stay tuned for Part 2 of Gardening, Not Rocket Science tomorrow!

Happiest of all Hours

Yesterday I attended (ahem, crashed) the DC Food Bloggers Happy Hour at Poste. It was awesome meeting others really, really excited about food. Oh, and the truffle fries were fabulous.

To Jenna at ModernDomestic, Mary at The Arugula Files, Amelia at Gradually Greener, Martha at A Measured Memory, Mer at Wicked Cranberry , Katie whom I know will be starting a food blog of her own soon, Stephanie at Sassy Dining, Olga at Mango and Tomato, Lisa at Dining in DC, and all the other great food bloggers at the event: It was great meeting you!

And, I've got more sage. No, seriously...I do. It's U-Pick and you'll have to truck out to the wilds of Arlington to get it....

Wednesday, September 2, 2009

Stewed & Canned Tomatoes

Success!!!

{fist pump}

Canning is pretty freaky. Every time I thought about doing it, I was convinced I'd kill myself or someone else with botulism from improper canning practices. Perhaps because I didn't really grow up with it? My mom once canned strawberry jam, I snuck a large sip of the foamy, starwberry-y, sugary stuff she was skimming off, and felt an immediate sugar rush followed by an ill stomach for the rest of the day. And that was the extent of my exposure to the process.

So I was super stoked when I saw the talk about it a few weekends ago. I mean, here was a live person that I could ask all my questions and reassure me! She even demonstrated the process.

I left the event thinking: "Why was I afraid of doing THAT? THAT is easy." and "I can't wait to try this!" Talk about a successful presentation!

Thus, when I got a ridiculous amount of tomatoes in my CSA and no fresh ideas for them (that's a lie. I didn't feel like eating them), I decided to give this whole thing a try.

Here's what I used:
-- Jars (not like leftover pasta or jam jars. Like Ball Mason jars. I got mine at Shoppers near where they sell charcoal. But Freecycle works for the less impatient) with seals & lids
-- Large pot (I used a pasta pot)
-- Smaller pot (for cooking tomatoes. I used our smaller sauce pan)
-- Timer
-- Spoon for putting tomatoes in jar
-- Rubber tipped tongs (or canning jar grabber thingy. I couldn't find one of those & the rubber-tipped tongs worked pretty well.)

Here's what you do: (from Putting Food By)

Boil enough water to cover your jars & their lids & seals. My pot fits 2 jars, so I put 2 in even though I wasn't sure how many I would need.

When water is boiling, carefully add in jars with lids and seals. Boil for 10 minutes. This sanitizes everything.

Meanwhile, chop your tomatoes & put into a pot. Bring to a boil

.

When tomatoes reach a boil, cook for additional 5 minutes. They'll be cooking more later on, so it's OK if they aren't totally cooked through.

Back to the jars: When your 10 minutes is up, remove them from the water and add 1Tbsp of white vinegar into quart jars & 1/2Tbsp of white vinegar into pint jars. If the tomatoes have cooked for their 5 minutes, spoon into jars with vinegar in them. Leave about 1/2-1 of space in the top of the jar. Seal.

Make sure the large pot of water is back to a boil.

Return jarred, sealed tomatoes to the boiling water and cook for 35 min (pints) or 45 min (quarts)

When that's done, remove from water and let cool (don't put in fridge or anything. Just set aside). When it is totally cool, you shouldn't be able to remove the seal. This means: SUCCESS!

Side notes: I found a tea tray/The-Tray-I \-Eat-In-Front-of-The-TV-On tray lined with a clean kitchen towel a great way to stay organized, move hot jars around the kitchen and minimize mess. I used an oven mitt to lift the cooked, filled jars from the hot water...the tongs were just too cumbersome for this.