Thursday, July 30, 2009

Recipe: Homemade CSA Veggie Pizza

Two of you asked for my pizza recipe, so here it is! I first started making my own pizza dough b/c I was a poor, single grad student that lived alone. This meant that delivery was often out of my price range and that I had a lot of free time after a long day of studying (last thing I want to do after studying is hang around people. My brain is mush & making conversation just isn't going to happen). So, I started making my own pizza dough and stuffed won tons (for won ton soup). These tedious, repetitive tasks were a nice way for me to relax.

I think this crust is best simply topped with fresh tomato (this time from our CSA & garden!), basil (CSA) and mozzarella (I'll also describe how I do that) but by all means put whatever you want on it!

This makes 2 12-inch pizzas or one very large pizza. I use a KitchenAide Mixer now for the kneading but did it by hand in my grad school days. The good news is that I don't think it's possible to overwork pizza dough, especially by hand, so err on the side of too much rather than too little. This looks time consuming but the total hands-on time is probably close to 30 minutes.

Ingredients:
For dough

1 tsp sugar
1 Tbsp sugar
1.25 c warm water
1 packet of dry yeast
3 c all-purpose King Arthur White Wheat flour, divided (or regular all-purpose flour)
1 Tbsp olive oil
1 tsp salt
Cooking spray

dried oregano, optional
dried basil, optional
garlic powder, optional


For toppings
1-2 large, tomatoes, cored & sliced thin
1 bunch of basil, torn or chopped
salt & pepper
2 cloves of garlic, minced
mozzarella
parm

Directions
  1. Put tap water in Mixer bowl (or other good-sized bowl). This water should be bath-water temperature and not hotter. If it's too hot for you, it's too hot for yeast! Pour in yeast & sugar and dissolve. Let stand 5 minutes. If after 5 minutes there's a bit of foam on top and the mixture smells like bread, your yeast survived. If it doesn't look any different, start over using cooler water.
  2. Lightly spoon in 2.75 cups of the flour, the olive oil, salt and, if you're wanting a flavored crust, now's the time to add in your oregano, dried basil, and/or garlic powder. Oh, and I add in an extra 1 Tbsp of sugar b/c I like sweeter crust a la Pizza Hut (yes. shut up). Stir to combine.
  3. At this point, if you're kneading by hand, dust your work surface (and hands) with flour and turn out the dough. You should knead for about 10 minutes or until the dough is elastic. Add the remaining flour 1 Tbsp at a time, if the dough feels wet. When done, roll dough into a ball, turning the bottom of the ball into itself (kinda like when you converted your Popple back into an innocent-looking "ball").

    If you're using you stand mixer, then just turn on low and then medium speed with your dough hook attachment. I don't leave my mixer for this...the mixer can act like your washing machine when all the towels get on one side! Mix for about 5 or so minutes or until the dough is really elastic, adding in the extra flour 1 Tbsp at a time as needed. When done, roll dough into a ball, turning the bottom of the ball into itself (kinda like when you converted your Popple back into an innocent-looking "ball").

  4. In a large bowl, spray cooking spray. Put dough ball in the bowl and spray the top of it with cooking spray. Put plastic wrap over dough (making contact with the dough itself) and place in a warm spot for an hour. Note: You could totally do the above in the morning & let the dough rise all day. Up until this point, the total hands-on time is about 20ish minutes if you are kneading by hand.


  5. When the dough has doubled, preheat the oven to 450*F, punch it down and spread out to the size of your pizza pan. There are many ways to do this (rolling pin, stretching, throwing up in the air!) so experiment & see what works for you. Put pizza in your pan


  6. Bake the pizza nekkid for 10 minutes.
  7. Meanwhile, drain your marinated tomatoes & dry them off as much as possible.
  8. After the 10 minutes, remove the pizza from the oven & drop the temperature down to 400*F. Top you pizza with whatever you like (I'm doing tomatoes first then mozzarella on top) but leave fresh basil for the end.
  9. Put pizza back into the oven & bake for 20 min or until cheese starts to get golden and the underside of the crust is brown & crispy.
  10. Let pizza cool at least 5 minutes before cutting into it. (Hot cheese is like lava. Trust me on this one!)
Enjoy!

Wednesday, July 29, 2009

Herb Garden Design

I am the first to admit that I am both cheap and lazy. Or perhaps "efficient" is a better term than "lazy" because I don't mind doing work but I certainly mind doing needless work. And, when it comes to herb gardens here in Northern Virginia you can create some needless work and expense. And y'all know I love herb gardens!

Primarily I'm talking about plant selection. Some of the workhorses of the herb garden just can't handle our winters. (Rosemary, I'm lookin' at you.) You either have pot it up and take it inside for the winter or just cross your fingers & hope for the best. Neither of these sound like a particularly tempting option to me.

Luckily, however, there are varieties out there of many of these "tender" perennials that don't mind living outside all year in NoVA*. I've found that you generally have to mail order or look at specialty nurseries to purchase these, but occasionally I've seen them at larger independent nurseries (not big box nurseries). Just because these are more hardy varieties doesn't necessarily mean that they don't taste good or they look awful.

This was my first year having a dedicated herb garden. Sure, I'd grown the odd pot with basil, mint or rosemary before but there seems something more definite when the plants are in-ground. Here's what my herb garden looks like this year:

In it is Arp Rosemary (hardy to -10*F), Greek Mountain Oregano (hardy to -20*F), Hidcote lavender (hardy to zone 5 so can survive our winter), parsley (biennial), mitsuba (hardy to zone 4. A Japanese parsley-like perennial herb. Planted in the parsley box too), english thyme (hardy to -20*F), chives (hardy to -40*F), bee balm and thai basil (an annual). Oh, and a mass of Unwin's dahlias because I didn't know where else to put them! The plants that will not come back next year are marked with an asterik in the graphic.

Overall, I'm pleased with how it's turned out. If anything my herb garden pays for itself more than my tomato plants! But, next year I'm going to put the dahlias some place else and want to add in a few more herbs and change it up a bit. Here's the working idea for next year:

You'll notice it has many of the same herbs but more parsley/mitsuba, sage (which is currently in a pot on the side yard) and red basil (well, purple might be a better description. Right now it's with the sage on the side yard). I'm not actually sure my bee balm/bergamot/mondara is going to survive this year; I'm still battling some powdery mildew. I'm saving a place for it just in case!

I've got 2 squares I'm not sure what to put in, though. I had thought mint, but I think I'm going to put a container of that right outside the herb garden (it's invasive). Likewise, I'm going to put my italian basil in with my tomatoes so no need for that in the herb garden. And I suck at growing cilantro. If anything that'll get put in the veg garden just for its flowers (they attract lady bugs) Hmph. I suppose I could go for a lesser used herb (borage? lovage? chervil?) or a crazy variety of something I already have (lemon thyme? pineapple sage?) but whatever it is, I want it to be winter hardy so that I can just plant once!

Anyone have any suggestions?


*Note that some perennial herbs will die down into the ground during winter but they will re-emerge in the spring, so don't be worried if they disappear on you when it starts getting cold! Also, if you container garden I've heard a good rule of thumb is that a plant will overwinter if it can handle 2 zones colder than you. NoVA is on the zone 6/'7 border, so look for plants at least hardy to zone 4/5 for your outdoor containers.

Monday, July 27, 2009

CSA Monday! Big Basil Edition

This week I got 2 ginormous handfuls of basil: one thai basil & one italian basil. Honestly, between the CSA & my garden I'm running out of ideas of what to do with it! I've already made 2 batches of pesto and froze 12 1/4 c disks of it chopped. But, I'm not sick of it yet!

Honestly, we're getting more produce then we can handle now. It's a bit tricky to use it up every week. Our CSA started out a bit scant because of the uber rainy spring. But now? Whoa!

Here's this week's haul:

Corn (4), italian basil, squash, thai basil, fresh garlic (1), purslane, tomatoes (2 huge ones!) and potatoes (7).

This week the plan is:

Pizza Margherita- Homemade pizza crust, tomatoes, mozzarella and italian basil.

Thai Chicken Stir-fry- My husband is using the thai basil to make an improvised kra pow chicken.

Vegetable Stew- Imagine the filling of a pot pie without the crust. Truth be told, I'm not a huge fan of crusts. I've taken some of the potatoes leftover from last week and added some leftover carrots, leftover cooked broccoli, handful of frozen peas, mushrooms and onions. Just make a roux and add chicken stock and thyme from the garden. It's pretty delicious. And mostly healthy. Throwing together bits & bobs into a meal is what I'm famous for!

Corn and Black Bean Enchiladas with Mole- We love mole. We vacationed in Oaxaca, Mexico to taste it from where it started. I found some great jarred stuff for the mole poblano. It's not as good as homemade, but it's not bad. We're going to roll some tortillas around corn & black beans and onions, pour on mole and top with cheese. Maybe if we have a little chicken leftover somewhere I will put that in too. I'm going to add the purslane to some lettuce for a salad to serve along the enchiladas.

Friday, July 24, 2009

Squirrel-Proof the Tomatoes

Has this happened to you?

You've waited for months for the gorgeous globes of green tomatoes to slowly, but surely, turn a beautiful fire engine red. Daily, your mouth waters at the thought of a ripe, juicy, full of flavor tomato that you have raised from seed. The anticipation, it kills you because you are not an exceptionally patient person to begin with (or perhaps this is me).

Then, one day, you pop out to the garden to check on the ripening progress only to find A STUPID SQUIRREL has meddled (bitten, stolen, whatever) with YOUR tomato. Or maybe it was a bird. It doesn't matter what it was! Your tomato is RUINED! All those days...for nothing.

It's a jungle out there, I tell you.

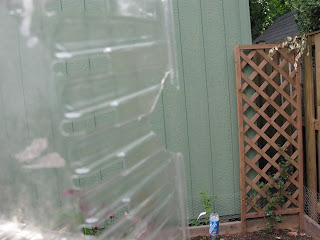
However, I read somewhere about a great protection system for your tomatoes was using old strawberry, blueberry, or grape tomato plastic clamshells to enclose them. This way air and light can still get in, but critters won't be able to take a bite. Brilliant! Wish it was my idea.

Also, since clamshell packages generally aren't recyclable, this is a great way for them not to go to waste. You can probably even reuse for a few years before they are too brittle.

Downside? They aren't entirely attractive. At all. But I can tolerate a little ugliness in the garden if it'll protect my precious tomatoes.


Here's what you need to do:

Cut a hole on one side of the clamshell container at the edge where it meets the lid. It doesn't really matter what side as long as it's not the hinged one. I did the side parallel to the hinged side:


Then, place the stem of your tomato cluster in the hole you cute & snap the lid close. Ta-da!


I told you it wasn't cute.

Wednesday, July 22, 2009

Recipe: Choose Your Own Adventure Slaw

Kinda spawned by today's earlier post on 101 Simple Salads...

A friend was lamenting that she had a BBQ to go to and got cabbage in her CSA bag (lucky girl!). Being a good southern girl, I proclaimed that I came from a long line of slaw and cooked cabbage eating peoples. If there's one thing you learn from birth in my family, it's how to make a slaw!

Growing up "slaw" always meant a mayo-based dressing coating a cabbage & carrot salad. But with increase food safety awareness and the slowing of everyone's metabolism as they aged, the matriarchs of my family slowly moved onto the vinaigrette-based slaw. Plus I think mayo because not so culinary cool (as if my family ever really followed food trends) circa 1992. We've done so many variations on the no-mayo slaw that I have just decided to generalize the recipe and call it Choose Your Own Adventure (did you ever read those books growing up? Awesome concept.) Here it is:

The Salad:

6 cups of shredded cabbage (of your choice: regular, napa, savoy, red, etc)
1-2 cup sliced/shredded/julienned accent veg (green/red/yellow peppers, carrots, jicama, green apples, tomatoes, etc)
accent flavor*

The Dressing:

2 tbsp dijon mustard
2 tbsp acid (lime juice, red wine vinegar, cider vinegar, lemon juice, etc)
1 clove garlic, minced
1/4 c oil (olive, peanut, canola)
Salt & pepper

Instructions:

Mix dressing ingredients. Mix salad ingredients. Pour dressing on top of salad & toss to combine.


*Accent flavors. Pick 1-3 of the following:
- 1tbsp hot peppers, minced
-1/4 c parsley
-1/4 c cilantro
- 1 c feta cheese (or more! yum!)
- 1/4 scallion
- 1 c dried fruit (raisins, currents. apricots are nice with red cabbage)
- 1/4 c mint, basil, or...heck...any leafy herb really (I don't think something woody like rosemary would really work, but you can always give it a shot!)


Some ideas:

A "Greek" slaw would use maybe a mix of tomatoes & peppers for accent veg, feta/scallion/parsley for accent flavor, and red wine vinegar as the acid.

For "Mexican" slaw, maybe carrots & jicama for accent veg, hot peppers/cilantro for accent flavor & lime for acid

For "Sweet/Savory" slaw, maybe green apples shredded for accent veg, red cabbage, dried fruit for accent flavor and lemon or cider vinegar for acid.

NYTimes 101 Simple Salads

There is something to be said for a simple salad. Summer is the best time to enjoy such a salad since produce is at it's peak and it's just too hot to cook. Besides, for many summer vegetables eating them raw really helps you appreciate their freshness and flavor.

So, if you've got a bag full of CSA produce you're looking to use or if you're just avoiding your stove, check it out the NY Times' list of 101 Simple Salads.

And share any simple salad recipes you may have!

Fall Planting Calendar

As you know, you need to buy your fall seeds ASAP. It may be even too late, depending where you are and what you want to plant. I've been having a hard time figuring out when to actually plant fall crops. The problem is that after a frost, some plants will die. So there is a very final part of the growing season.

For Arlington, it looks like the average first frost date is mid-October.

Um, ok. So what does that mean? Different plants have different germination times and different number of days to maturity. It can get very confusing, very fast.

I was scratching my head about this whole thing & decided to procrastinate by looking at gardening blogs. What I tend to do is find a blog I like, then read all their posts. THEN, I look at their blog roll, find a blog from there I like, and read all those posts. This method, unbeknown to me, lead to my solution. I stumbled across Skippy's Vegetable Garden blog....which had a Fall Planting Calendar.

Just put in your average last frost date & click "Generate Fall Planting Calender"! Score!

I'm a little late on some things, but I wasn't planning to plant them anyway. I love how this takes a large hunk of the guesswork (and math) out of fall crops.

Monday, July 20, 2009

CSA Monday! No Cabbage Edition

After 3 weeks (?) of getting a cabbage the size of my head, my husband was surprisingly disappointed in not getting a cabbage this week. He very much was looking forward to making Pilkliz.

Here's the haul:
1 medium broccoli, 1 massive zucchini, 7 potatoes the size of my fist, 1 cucumber, 1 fresh garlic, 1 globe (?) eggplant, and as much basil & oregano as I can eat.

Compared perhaps to last week, this week's meal plan is kinda lame but sometimes you just feel like making the obvious with the ingredients & just keeping everything simple!:

Baked Falafel Sandwiches
: Frozen chickpeas (I make a large batch of dried & freeze) formed into patties will be drizzled with a cucumber taziki sauce and topped with lettuce (from grocery) and tomatoes (from garden). Maybe I'll heat up some frozen corn too. I love fafalel's with corn a la the one I had in the Hague. All stuffed into a whole wheat pita. Yum.

Baked Potatoes & Cheesy Broccoli: When I was little I would only eat broccoli if it was smothered in cheese. Times have changed (I like broccoli all sorts of ways now), but I still love it most with cheddar. Throw it on top of a baked potato & you've got a fast & fabulous dinner or weekend lunch.

Jerk Chicken with Pikliz and Grilled Eggplant & Zuc. I bought a small cabbage at the grocery store to make my husband's dream of Pikliz a reality. We'll use (blasphemously) some cayenne peppers from the garden in it instead of scotch bonnet. Since the grill will already be fired up for the chicken, might as well throw on the nightshade veg. It's my favorite way to have them anyways.

Marinara. My husband has honed his signature recipe. It involves canned tomatoes, caramelized onions, plenty of garlic and fresh basil & oregano.

If I was going to be interesting with my meals this week, I think I would have done some sort of potato-zucchini gratin and maybe some kind of indian curry with the eggplant and make a condiment out of the cucumber. But grilled veg just sounds so good.

Friday, July 17, 2009

Arlington Homes & Gardens, Part 3

I think that I've metioned before how much I love cottage-y gardens. I'm planning to cottage-ify the very front of our lawn that slopes towards the sidewalk. For the third installment of Arlington Homes & Gardens I present this lovely jumble of color & texture.

Why do I like it? It's controlled chaos. Densely planting also usually means less weeding. And, it's colorful. If you could see the inside of my house, you'd know I wasn't afraid of a bold use of color!

What I was most concerned about my upcoming project (not going to start until fall when the rains will return. I'm all about the free water!), was not being able to plant lavender. Sure, I've got some lavender in the herb garden, but that's on the side yard. And who WOULDN'T love to be greeted by the smell of lavender as they approach their front door? (Answer: Nobody.) Since lavender loves well-draining soil & I've got "I don't ever want to drain" clay soil, planting on a slope with a teeny bit of soil amendment should work out perfectly! The water can't stagnate and I don't have to do serious amendment.

But how would lavender look with coneflowers I wanted to plant and the liriope that already exists? Being the novice landscaper & a highly visual person, I couldn't quite imagine it. Until, that is, I passed this house!
As it turns out, the coneflower & lavender look fabulous together (see below). While I'm not a huge fan of daylilies, they have a similar color & texture to the liriope, so I think that will also look nice.


Thursday, July 16, 2009

Recipe: Tale of 2 Cabbage Casseroles

This week I got a cabbage the size of my head from my CSA. There's only one recipe I know that could possible handle such a massive amount of cabbage: Nana's Cabbage Rolls.

Cabbage rolls, specifically this recipe, were my grandfather's favorite dish. My grandma, Nana, would make it for his birthday since it was so time consuming. For me, it both reminds me of my grandfather and has a certain undeniable 1950s-retro appeal that I can't quite resist. That and it is delicious, cheap and I normally have most of the ingredients on hand. In short, the only thing not to love is the hands-on time requirement, plus the additional the 2 hours in the oven.

So, one day I had a revelation and turned my beloved grandma's recipe into a less time-consuming casserole and give it a modern kick. I'll share both of these recipes in case a mammoth head of cabbage falls into your CSA bag. Both these recipes serve 6 people.

Nana's Cabbage Rolls
1 large head of cabbage
1 lb ground beef (or turkey would work too)
1.5 c cooked rice
1 onion, diced
1 egg, slightly beaten
2 cans (10.5 oz) condensed tomato soup
1 can (28 oz) crushed tomatoes (or diced if you like chunky sauce)
4 tbsp lemon juice
4 tbsp dark brown sugar

salt & pepper

  1. Preheat oven to 350*F
  2. Prepare cabbage by slicing a 1-inch piece off the bottom of the cabbage. Put cabbage in large pot and cover with water. Bring to a boil & let boil about 10 minutes. Drain. Remove at least 12 outer leaves so that they are whole. Cut out the rib if it is heavy. Chop up the rest of the cabbage.
  3. Spread a layer of chopped cabbage at the bottom of an 9x13 glass baking dish.
  4. Mix together beef, rice, onion, egg, salt & pepper, & 4 tbsp of the condensed soup. This is the filling.
  5. Divide the filling between your prepared cabbage leaves by placing an equal amount in the middle of each whole leaf.
  6. Roll up leaves, like an envelope (tucking the sides, if possible, in). Place seam side down in the chopped cabbage covered baking dish.
  7. Mix together the remaining soup, canned tomatoes, lemon juice & brown sugar. Pour over rolls.
  8. Cover with foil and bake about 1.5 hours. Then, uncover and bake 30 minutes or until cooked through.
Katy's Cabbage Roll Casserole
(My version plays up the sweet-and-sour nature of the original, plus cuts down on cooking time and hands-on time. I highly recommend using hot Hungarian paprika if you have it...it gives a nick subtle kick)

1 large head of cabbage, finely chopped
1 lb ground beef (or turkey would work too)
1.5 c cooked rice
1 onion, diced

1/2 c raisins, optional
2 cans (10.5 oz) condensed tomato soup
1 can (28 oz) crushed tomatoes (or diced if you like chunky sauce)
4 tbsp lemon juice
4 tbsp dark brown sugar

oil
salt & pepper
hot Hungarian paprika, optional

  1. Preheat oven to 350*F
  2. Heat a little oil in a skillet. Add onions & cook until just translucent. Then add beef & cook until brown. Next, add cooked rice and stir until everything is combined & rice is coated with fat/meat juices. Season with salt, pepper & hot Hungarian paprika.
  3. Add tomato soup, canned tomatoes, lemon juice and dark brown sugar to the meat & rice mixture. Stir to combine & turn off heat.
  4. In a baking dish, spoon a bit of the meat sauce in the bottom. Next add a layer of chopped cabbage. Press down. Top with meat sauce.
  5. Repeat the alternating of cabbage & meat sauce until your finish with cabbage on top.
  6. Cover baking dish with foil and bake for 55 minutes. Then, take off foil and bake another 30 minutes until cabbage is tender. One of my favorite parts is the top layer of cabbage that gets brown around the edges. If you don't like this, end on a sauce layer.
Tastes better than it looks. Promise.

Tuesday, July 14, 2009

Beware, Roundup Users

I have been known to use the occasional squirt of Roundup to try to control bindweed (this is after hand-pulling, hot vinegar and boiling water treatments). My head hangs in shame! I had comforted myself that I had tried the organic methods & nothing was working on this invasive weed that was strangling my poor, innocent hostas, toad lilies and strawberries.

Garden Rant's post today links to a Scientific American article on that Roundup may not be as innocent as you think. Glysophate, the active ingredient in Roundup, is not the focus of the new research...the mixture of the inert ingredients are. Now, I don't mean to be an alarmist or tell you that if you use Roundup you are the devil. However, I think it's always a good idea to be an informed consumer and to know the risk of the chemicals around you.

Here are some excerpts from the article, but I encourage you to read the entire thing:

"The research team suspects that Roundup might cause pregnancy problems by interfering with hormone production, possibly leading to abnormal fetal development, low birth weights or miscarriages."

"In the French study, researchers tested four different Roundup formulations, all containing POEA and glyphosate at concentrations below the recommended lawn and agricultural dose. They also tested POEA and glyphosate separately to determine which caused more damage to embryonic, placental and umbilical cord cells.

Glyphosate, POEA and all four Roundup formulations damaged all three cell types. Umbilical cord cells were especially sensitive to POEA. Glyphosate became more harmful when combined with POEA, and POEA alone was more deadly to cells than glyphosate. The research appears in the January issue of the journal Chemical Research in Toxicology."

"Most research has examined glyphosate alone, rather than combined with Roundup’s inert ingredients. Researchers who have studied Roundup formulations have drawn conclusions similar to the Seralini group’s. For example, in 2005, University of Pittsburg ecologists added Roundup at the manufacturer’s recommended dose to ponds filled with frog and toad tadpoles. When they returned two weeks later, they found that 50 to 100 percent of the populations of several species of tadpoles had been killed."

Monday, July 13, 2009

CSA Monday! Big Squash Edition

CSA season is in full swing here in the DC area. Spring greens are giving way to summer vegetables which is tres exciting. But then the problem is: What do I do with a mess of vegetables every week?

This is a problem I've heard my fellow CSAers lament as we stand in line to pick up our shares. So, I've thought that I would share what I do with my produce.

[geek moment]

To me, meal planning is like a logic puzzle. In short, I try to solve this equation every week:

meals = max(CSA share veg) + min(new groceries) + pantry/freezer items

In words: how can I use up all my share with buying as few additional things as possible? This is my challenge every week. And I totally get excited at considering all the possible combinations. Almost too excited.

[/geek moment]

This week I got 1 good-sized head of cabbage, 1 large patty-pan squash, 1 large zucchini, 7 potatoes about the size of a fist, 1 fresh garlic, 1 small head of broccoli and 1 bunch of basil. This week's plan?

Very Veggie Pasta Salad: the squashes, a clove of garlic, broccoli, & basil + half a pound of pasta, sun dried tomatoes, sun gold tomatoes from the garden, balsamic vinaigrette (balsamic vinegar, dijon mustard, oil, dried basil, dried oregano, olive oil, & honey).


Nana's Cabbage Rolls Unrolled (aka Katy's Cabbage Roll Casserole): the cabbage & garlic + onions, rice, ground beef, paprika, raisins, canned tomatoes and (believe it or not) can of condensed tomato soup. The recipe sounds bizarre but for me it's comfort food...and very retro 1950s!

Quick pickles: cucumbers & garlic + dill, vinegar & some other spices I have around. This will be used as a side with burgers for this weekend.

Oven garlic fries: potatoes & garlic + olive oil. To also go with the burgers this weekend.


If you were given this particular mess of vegetables, what would you do?

Powdery Mildew

(Excuse blurry photo. Blistering hot day + wind = little patience on my part!>>>)

Do your leaves look like baby powder has spilled on them? Or that they might be a tad bit dusty? Then, my friend, you've got powdery mildew. Sounds gross, right?!?

Well, that's because it is! It's a fungus. Think "athlete's foot" but for plants. Totally rank.

Here's a more mature account from GardenGuides.com:

Powdery mildew is a common disease on many types of plants. In fact, it is one of the oldest plant diseases on record - Theophrastis wrote of powdery mildew on roses in 300 B.C. Although different species of fungi cause the disease on different plants (Erysiphe infects vegetable crops and flowers; Podosphaera species infects apples and stone fruits; Sphaerotheca species infects berries, roses, some vegetable crops, and stone fruits; and Uncinula necator infects grapes), the infections are all characterized by a powdery white to gray fungal growth on leaves, stems and heads.

Contrary to popular belief, powdery mildew generally does not require free water to establish and grow. Infection can actually occur on dry leaves. Warm temperatures and shady conditions encourage the fungus to grow and spread. However, the spores and mycelium are sensitive to extreme heat and direct sunlight.

My beloved bergamot/bee balm/wild monarda have been plagued with the powdery mildew. It's not a complete surprise b/c they are susceptible, but I had tried to keep them in an area with good air circulation. Clearly, that was a garden FAIL.

But, powdery mildew is very treatable. Here are your options:
  1. Commercially available fungicide. Read the label & it should list powdery mildew as something it treats
  2. Home remedy of baking soda: Mix 1 tsp baking soda with 1 qt water & a few drops of liquid soap. Spray undersides & tops of leaves. The baking soda increases the pH of the leave surface & makes it an unsuitable growing environment for the fungus.
  3. Home remedy of milk: Mix 1-part milk to 9-parts water (DO NOT go above a 1-to-3 concentration. You'll then get a fungus of a different kind) & spray tops & bottoms of leaves. This works like option #2. Skim milk is preferred b/c it doesn't have the fat that could go rancid or attract critters.
And, how to prevent powdery mildew from happening next year?
  1. Remove fallen, infected leaves.
  2. Plant resistant varieties (too bad for me...I don't know of any resistant monarda varieties.)
  3. Plant in well-draining, sunny area.
  4. Don't crowd plants. Allow for good air circulation (this I am guilty of...the dahlias grew bigger than I had expected...)
  5. Disinfect tools used on infected plant to prevent spread to other plants.
  6. Water in the morning.
  7. Don't live in a humid climate! :)

Sunday, July 12, 2009

Breaking News: Tomato Blight Hits Big Box Stores


Poor, unsuspecting tomatoes.

The whole story is here: http://www.wusa9.com/rss/local_article.aspx?storyid=88076

The short version? A wholesale seedling distributor sold plants that have been known to carry tomato blight. And, as a result, tomato plants have been pulled from the shelves of Home Depot, Lowes, Wal-mart, etc. For tomatoes, blight is "worse that the Bubonic plague" for humans and was the cause of the 1800s Potato Famine (potatoes & tomatoes are in the same family). Also note that late blight is a death sentence for your tomatoes. But only for tomatoes. For humans, dogs, cats, and ankle-biters (kiddos), it's harmless.

What is late blight?
It's a disease caused by a fungal pathogen. Creepy. Even creepier is that it can overwinter in your soil (via perennial weeds, potato tubers)! The spores can travel (via wind) great distances and with a rainy growing season (like we've had this year), they are more prevalent.

How do I spot late blight?
"The first sign is often brown spots on plant stems, followed by nickel-sized olive-green or brown spots on the tops of leaves and fuzzy white fungal growth underneath. Tomato fruit will show firm, brown spots."

Crap. My tomatoes have late blight? What do I do?!?
Act fast: Destroy all infected plants. Do not put them in your compost, do not let them touch other tomato plants, do not pass go, do not collect $200! Throw the plants away post-haste. And sanitize any shovels/gloves you may have been using to do the deed. Ya know, to prevent infecting additional plants. Also, if your neighbors are growing tomatoes, have them check on their tomatoes. Because the spores can travel in the air, infected tomatoes can devastate your crop, even if you started from seed.


Why hasn't this been talked about more? It is unclear on how widespread this is, but there is certainly the potential to wipe out an entire season of a farmer's crop if s/he bought from the wholesaler/distributor!

Friday, July 10, 2009

Project: Garden Path

You may recall that our garden was smack-dab in the middle of a bare patch of clay. As long as I kept it weeded, it didn't look BAD, but it looked far from GOOD. And weeding constantly was not my favorite.

Obvioiusly this photo is a few months old, given the size of plants.

So, we decided on creating a non-grass path around the garden. Our first thought was laying stone, whether it be pavers or a collection of stepping stones with coconut or creeping thyme planted between or around the edges. This would be the most charming option, I think. However, it would also be the most labor intensive (ground would need to be leveled and then a multi-step process would ensue) and expensive as I was a big fan of some of the most expensive stone in the quarry.

Our second, and cheaper/easier, thought was to do a gravel path. We found some nice blue stone gravel quite cheap. Eventually we could add stepping stones in the gravel, we thought, and we could still plant thyme or other ground cover against the raised beds to soften the look a little bit. We were quite excited about this idea until....

Until I remembered the hell that is raking leaves. We've got 2 trees in the back yard & our neighbors both have trees in the front & back yards. For a small yard, we get bags & bags of leaves in the fall. And then in the spring, we get the remnants of their flowering tree. Dealing with leaves & flower parts on gravel (without a blower) was not something we were thrilled with. Sadness then set in as we thought we were doomed with an ugly, weedy clay path.

Then....EUREKA!!

Mulch. Here in Arlington, mulch is free if you collect it from the county (I believe Fairfax County as a similar deal if you live there). We'd get some edging to help contain the mulch and use newspaper & cardboard boxes as weed block. The project would be cheap! And easy! Hurray!

So, first we put in the black edging. Next, we laid down several layers of newspaper/brown bags/cardboard:

Then, we dumped on the mulch & spread it all out:


Total cost? About $20.

I think it looks better. And in fall, we'll probably leave many of the leaves in the garden area, so raking won't be an issue. Eventually we will probably do something with stones. Especially since we plan to add stepping stones leading up to the garden as the grass is getting quite worn along that way. But for now? This was a great compromise of labor & price. As an added bonus, we recycled & reused!


Tuesday, July 7, 2009

Recipe: Kra Pow Chicken

Thai cooking is like a piece of music from any of the great composer. There's a balance of the astringent shriek of flutes or piccolos and the deep voice of a cello, as well as the different textural quality of brass instruments vs. string instruments vs. woodwind instruments. In short, it's a symphony in your mouth with the principle instruments being sweet, sour, salty and spicy.

My love for thai food is so great, it's where I went on my honeymoon. My husband & I ate our way through the country; from Koh Samui to Chaing Mai and Chiang Rai to Bangkok we ate at markets, street food vendors, and fine restaurants. Without a doubt, it was the market stalls that were our favorite. And my favorite dish, which is also apparently a favorite of the Thais and widely available, is kra pow.

Here's my recipe, adapted from a cookbook I got in Thailand: A Passion for Thai Cooking, for Kra Pow Chicken using the cayenne peppers and thai basil from my garden. Note, that I planted these in vast quantities explicitly to make this dish!

Ingredients:
1 lb ground chicken (or pork)
oil
12 cloves of garlic, minced (trust me. lots of garlic is key)
2-4 cayenne peppers (2 = "American hot", 4= approaching "Thai hot")
.25-1 c chicken stock (depends how saucy you like stir-fries)
1.5 c thai basil leaves

6 Tbsp. oyster sauce
4 Tbsp. fish sauce (no substitutions available for this. It smells weird, but it's a key "deep note" in this symphony)
1/4 Tbsp brown sugar
2 tsp soy sauce

Instructions:
  1. In a bowl, mix the last 4 ingredients. This is the sauce.
  2. Heat oil in a large skillet. Add garlic & chilies and cook until garlic is golden.
  3. Add meat & cook until brown.
  4. Add the sauce to the meat, then add chicken stock. Heat through, taste & adjust seasoning if desired.
  5. Take off heat, add basil. Stir to combine & serve with jasmine rice.

Saturday, July 4, 2009

All About: Unwin's Dahlia

I *love* dahlias. Love.

They are happier, in my opinion, than gerbera daisies. The layered, multiple petals are so luscious and the vibrant colors are so cheery! I'm happier, right now, just thinking about them.

However, dahlias do not thrive in the DC area. You've got to pull them out before winter and store them inside in a dry place. Then, in the spring, you've got to plant them again. Truthfully, I am way too lazy for that. Seriously. Replanting a perennial every year? Blah. Last year I tried to grow some "real" dahlias and the powdery mildew was off the hook. As if I had time to deal with THAT, on top of the constant planting, unplanting!

But, I still can't resist....

This year I started Unwin's Dahlias from seeds. I figure, meh, they're annuals & if they don't work out, the packet of seeds was less than $2, unlike the tubers you buy. Apparently, after a season, the Unwin's Dahlias do form tubers which you can take out of the ground & store & replant. But, happily, they grow quite easily & cheaply from seed. In fact, they were my very first sprout this year & grew quite vigorously. I then planted them in our herb garden where they have grown even more.

In short, I will be growing these every year from now on. Or at least every year I start vegetables by seed. Here are the colors that have popped up so far:


I've still got a few plants with buds that haven't opened yet. I think I spy a vibrant orange...

Wednesday, July 1, 2009

Nasturtiums & Aphids


So, I had heard & read that nasturtiums are a lovely companion plant for your vegetable garden. As a bonus, the leaves & flowers are edible.

So, I was sold! I planted 3 around my tomatoes. And they were quite lovely, although they didn't flower much in my fertile soil (apparently they like crappy soil...)

Thus far, I've enjoyed a mostly pest-free garden! Then, I noticed an army of ants marching through the garden. And I turned over a leaf of the nasturtium to reveal THAT (:::pointing excitedly to photo above:::). Aphids! Black Aphids! On ALL the leaves.

And then I google a bit more and...um...realize that that is what nasturtiums do: Attract black aphids. Le duh, you might say. Since the nasturtium was covered with aphids and kinda on its last legs anyways, I pulled it out & threw it away (aphids & all!). I gave it a little eulogy as I chucked it into the trash, thanking it for it's service in protecting my vegetables. It was a good plant, may it R.I.P.

I've done a bit more reading on the subject. Did you know that when planted next to squash to deter cucumber beetles? Or, did you know that when planted next to eggplant, flea beetles will munch on nasturtium instead?

Nasturtiums: More Than Just a Pretty Face.

BTW...Anyone got an idea on what the non-aphid, bigger critters are in the photo above?!?