
Showing posts with label tomato. Show all posts

Friday, August 20, 2010

Recipe: Edisto Tomato Pie

This recipe comes to you via my internet friend that lives in RoVA. As you may know, NoVA (Northern Virginia) is not really part of the deep south like the rest of the state (RoVA). As such, you'll find fewer casseroles served up dinner round these parts and you'll certainly find less use of mayo in cooking.

I know what you're thinking: "Warm mayo sounds foul." I once shared your beliefs until I found out some of my favorite casseroles included mayo. I had been eaten warm mayo! And lived to tell the tale!!

Thus, if you find yourself with a ridiculous amount of tomatoes and are willing to be brave, I urge you to give this recipe a shot. I doubled the recipe below, used Pilsbury pre-made pie dough & threw in into a baking dish instead of a pie plate. It would be especially nice served up with fresh field peas or butter beans (cooked with bacon or ham hocks, of course!).

Ingredients (Serves 6)
1 deep dish pie crust, pre-baked for 10 minutes at 375*
5 large tomatoes, cored & thickly sliced
1/2 tsp salt
1/2 tsp black pepper
1 tsp garlic powder
4 tsp of your choice: dried basil, dried thyme, dried oregano or mixture of all 3 (I did an equal part mix of all 3)
3/4 c mayo
1.25 c shredded sharp cheddar cheese


Directions
1. Turn down oven to 350*
2. Mix salt, pepper, garlic powder & herbs in a bowl.
3. Arrange one layer of tomatoes in pie shell. Sprinkle over with seasoning mixture. Repeat until all tomatoes are used. (I left the ends of the tomatoes for the top.)
4. Mix mayo & cheese in a bowl. Top pie with mixture.
5. Bake for 35 minutes or until bubbly and brown. Let stand 5 minutes before serving.
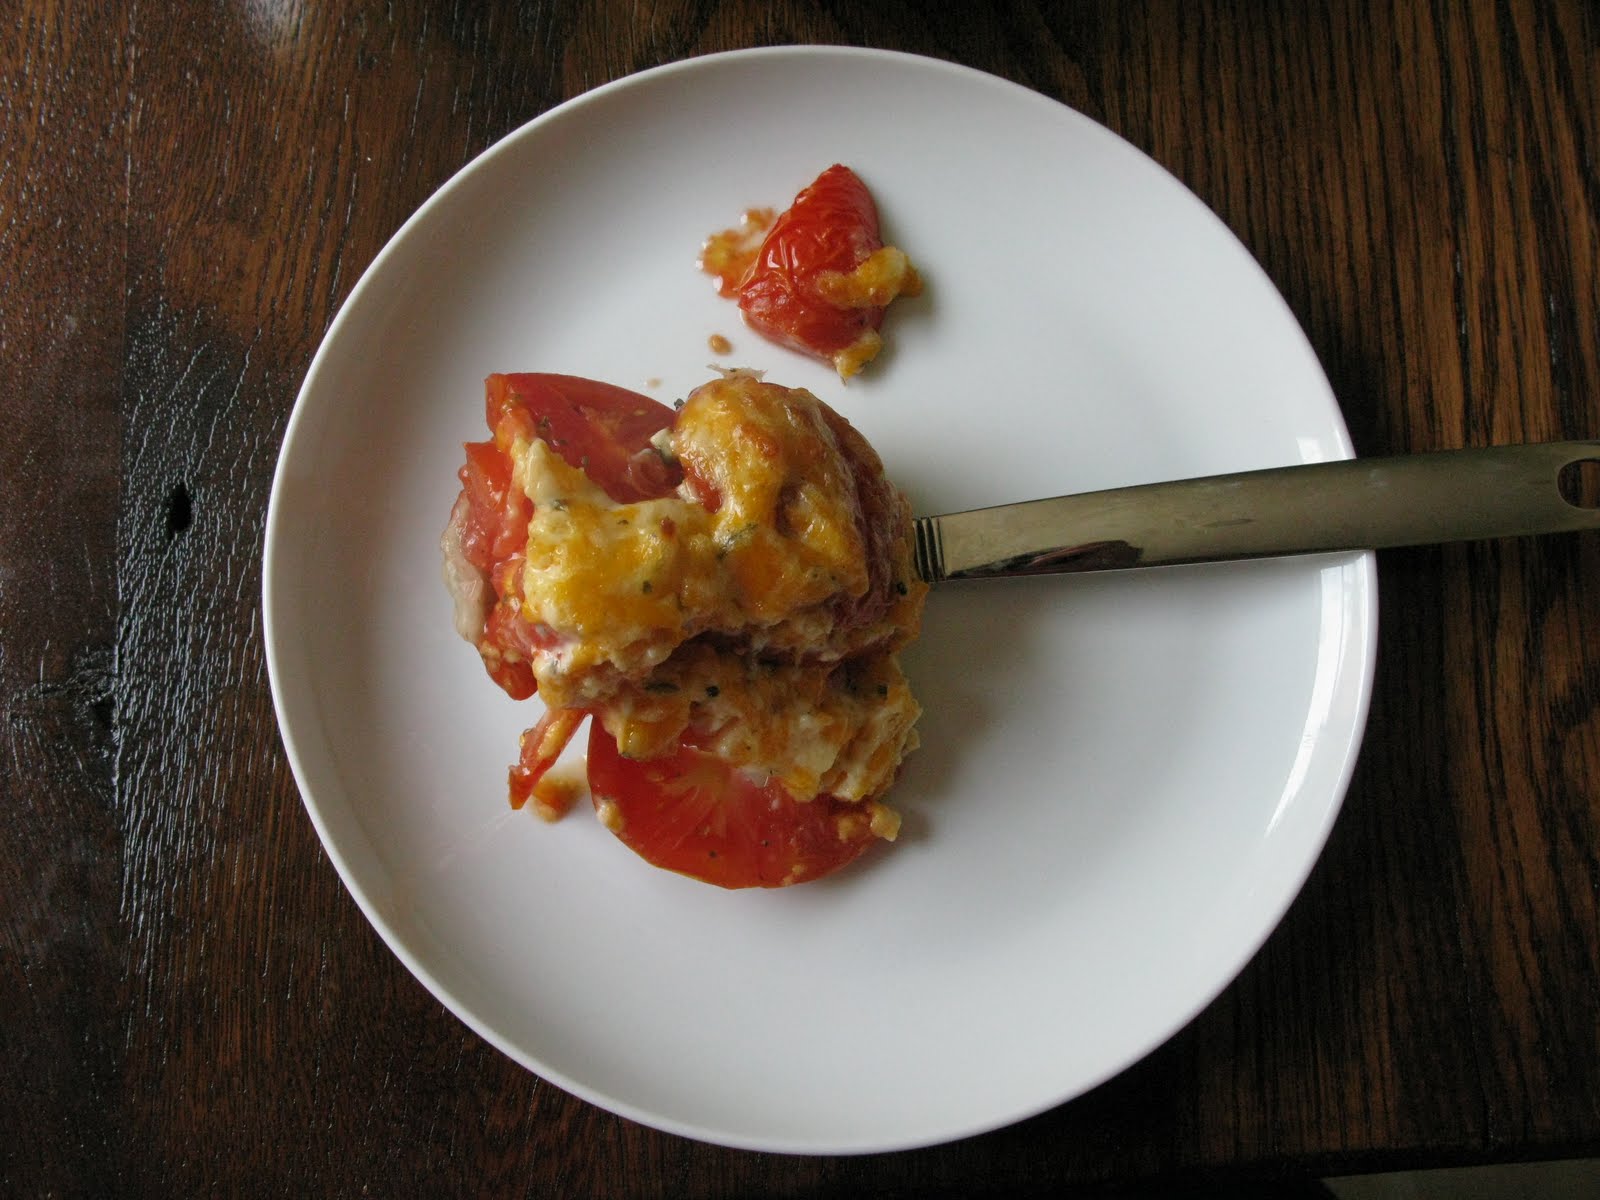
Looks harmless & delicious, right? That's because warm mayo is neither scary nor gross.

See? Told you! Delicious!

Thursday, August 19, 2010

Recipe: Gazpacho

The tomato saga continues...

I never liked gazpacho even though I never had it. Cold soup? Blech! Don't need a taste to figure out that would be g-r-o-s-s. Not to mention I went through a finicky stage with tomatoes (no chunks of tomatoes in pasta sauce, but I could eat them on a sandwich or salad no problem) in my youth. As I, and my tastes, matured, gazpacho fell off my radar.

Until my husband & I spent our first anniversary exploring the Andalucia region of Spain. In a fantastic tapas bar in Granada, you got a "free" tapa with each drink order. The "free" tapa the day we went was gazpacho. (Note that I rarely turn down free food, no matter if I'll like it or not.) I took a hesitant bite....it was *delicious*! And perfect for the hot weather. What was wrong with me & why hadn't I given this a try earlier???!!?? (Don't answer that.)

This recipe is a Jose Andres incarnation. Except mine doesn't look as pretty as I just topped it with freshly cracked black pepper and fleur de sel. And doesn't have sherry or sherry vinegar. I completely omitted the sherry as I don't drink it & wasn't going to buy a bottle of the good stuff (simple recipes are not the place to use suboptimal ingredients). I substituted red wine vinegar for the sherry vinegar as some of my tapas cookbooks had that in their recipe. Thus, I feel that substitution is legit. Serve this with little garlic toasts.*

Word on the interwebs is that pureed gazpacho like this freezes OK. Not sure this stuff will last that long, but if I give it a try, I'll update this post.

Ingredients (serves 6-8)

1/2 English/hothouse cucumber, peeled and chopped
1 green bell pepper, seeded and diced
3 pounds ripe tomatoes, diced
2 garlic cloves
1/4 cup red wine vinegar
3/4 cup good quality extra-virgin olive oil


Directions
1. Throw everything in the blender or food processor and puree until smooth. (Note: that this almost exceeded the capacity of my 9 cup food processor, so you may want to do in batches)
2. If desired (I didn't do this), pour through mesh sieve into serving vessel (pitcher, bowl, etc.)
3. Refrigerate for at least 30 minutes for flavors to combine.
4. Top with salt & pepper or Jose's fancy, schmancy toppings

*Slice crusty bread & toast both sides. While still warm, take a garlic clove & rub one side of each toast. Season with salt & pepper (this is critical).

Wednesday, July 14, 2010

I Just Picked a POUND of Tomatoes

Stupice tomato plants, I think I love you!

I'm still having to pick them half-ripe so that the critters won't get them before we do, but that's a small price to pay. Sure, these are not giant tomatoes, but I couldn't grow those anyways. These little fellas are small but mighty! Honestly, their production is starting to rival my Sungolds. It seems like both are setting about the same number of baby fruits.

So, I really recommend checking out this heirloom variety if you're kind of lacking in the sun situation and are looking for something other than a cherry tomato (these are about 2-3" balls).

I've got lots of tiny pickling cucumbers that I'm anxiously waiting to grow.

Monday, July 12, 2010

Organic Gardening Blues

After getting tomatoes earlier this year and having a much drier spring, I felt confident that the I was out of the woods with respect to tomato diseases. Unfortunately, this was not the case. I suspected a fungus had attacked 3 of my plants and had this confirmed at Merrifield's plant help desk. An organic gardener then faces a decision: Do I rip & dispose of these plants or do I succumb to using a conventional fungicide?

It's a really hard decision. To take out those plants means taking out all the canning tomatoes that I've nurtured for months. Plus, since I have a small garden, every space counts. Removal takes out 1/3 of my total tomato crop and 1/2 of my non-cherry tomato crop. But, if I did spray, the plants would have significantly less pesticides than conventional produce in the grocery store. However, then it's not an organic garden. Do I lose potential yield or do I go against my organic beliefs?

Ultimately, I did a hybrid approach: remove the plants with significant fungal issues and spot treat the plants near it with conventional fungicide (my husband actually did this). I'm not entirely pleased with this decision, but it's the decision I made. I feel like a bit of a hypocrite, honestly. Last year I also had fungal issues (and pulled out those plants) so I think going forward I'll only purchase seeds resistant to the common tomato fungi. And, of course, I'm going continue to be as sanitary as possible when handling my tomatoes.

Perhaps next year, then, this type of decision won't have to be made.

Saturday, September 26, 2009

Putting Up: Green Tomato & Apple Chutney

Believe it or not, my Sungolds are *still* producing. Slower, but I still get about 1/2 a pint of ripe cherry tomatoes per week. This weekend, I gleaned the garden. With the crispness of fall in the air and chilly nights I just feel like it is time to pull those babies up. May they RIP.

I oven-dried the ripe tomatoes (a whole tray full!) but what to do with the green tomatoes? I got inspired by Gradually Greener and decided to make a green tomato chutney. However, I don't have fig jam to use as a base.

Below is a recipe I found online but I've tweaked it to volume rather than weight which I think is probably more easy to follow. If you're going to can this, follow to ratio of tomatoes/onions/sugar/vinegar/etc. closely. You can certainly vary the spices but this is pretty darn good! If you aren't up for canning, freezing would work too.

Ingredients
5 c green cherry tomatoes, halved (about 2 1/4 lb)
2 Granny Smith apples, diced (about 1 lb)
2 medium onions, sliced
4 c cider vinegar
2 c brown sugar, minus 2 tbsp
1 c raisins
1.5 tsp mustard powder
1/4 tsp ground cloves
1 tsp ground cinnamon
1/4 tsp cayenne pepper

few tsp of oil

Directions
1. Heat oil in a pan. Add onions & caramelize.
2. Next, add the rest of the ingredients and bring to a boil. Lower to a simmer and cook for 45 min (up to 1 hour) or until thickened into a sauce.
3. If not canning, cool and either freeze or place in fridge.
4. If canning, boil jars and lids for 10 minutes. While still hot, pour in boiling chutney, place on lids (with fresh seals) and put back into the boiling water bath for 20 minutes. Let cool for 8 hours and check seals. Those that are well sealed, put up. Those that aren't, put in fridge and eat soon.


Makes 3 pints. Use this with roasted pork or chicken or with cheese and crackers. Or give as a holiday present to coworkers or a hostess gift for Thanksgiving (this would be fabulous with a good roast turkey).

Enjoy!

Friday, September 11, 2009

Putting Up: Oven Dried Tomatoes

My Sungolds are still producing, although at a slower rate than before. And, we picked our final few Wonder Lights. Add in the few red tomatoes I got from the Farmer's Market and it all adds up to more tomatoes than we care to eat at the moment. Although I'm sure come December my tune will change.

I've already covered canning (I've put up 3 quarts!). Freezing oven-dried tomatoes is another idea on what to do with any tomato surplus you may have. Or, oven-drying is a great way to make faux sun-dried tomatoes for all your recipes needs!

Here's what you do:

1. Preheat oven to 300*F.
2. Slice sauce or even cherry tomatoes halfwise (big tomatoes don't work great for this). De-seed the bigger tomatoes.
3. Place tomatoes on baking tray (I line mine with tin foil for ease of clean up) along with olive oil and/or dried herbs (Optional. Note: Woody herbs work best.). Don't use salt though.
4. Bake for 45 minutes.
5. Turn off oven, but leaves tomatoes inside for 2-4 hours. They should be a bit flexible and a tad moist but have very concentrated flavor.
6. To freeze, just take the baking tray from the cooled oven & place in the freezer for a few hours. When the tomatoes are individually frozen, put in a larger ziploc bag.


I like using these in pastas and purple basil pesto as well as an earthy addition to beef stews, salads, sandwiches, etc.

Wednesday, September 2, 2009

Stewed & Canned Tomatoes

Success!!!

{fist pump}

Canning is pretty freaky. Every time I thought about doing it, I was convinced I'd kill myself or someone else with botulism from improper canning practices. Perhaps because I didn't really grow up with it? My mom once canned strawberry jam, I snuck a large sip of the foamy, starwberry-y, sugary stuff she was skimming off, and felt an immediate sugar rush followed by an ill stomach for the rest of the day. And that was the extent of my exposure to the process.

So I was super stoked when I saw the talk about it a few weekends ago. I mean, here was a live person that I could ask all my questions and reassure me! She even demonstrated the process.

I left the event thinking: "Why was I afraid of doing THAT? THAT is easy." and "I can't wait to try this!" Talk about a successful presentation!

Thus, when I got a ridiculous amount of tomatoes in my CSA and no fresh ideas for them (that's a lie. I didn't feel like eating them), I decided to give this whole thing a try.

Here's what I used:
-- Jars (not like leftover pasta or jam jars. Like Ball Mason jars. I got mine at Shoppers near where they sell charcoal. But Freecycle works for the less impatient) with seals & lids
-- Large pot (I used a pasta pot)
-- Smaller pot (for cooking tomatoes. I used our smaller sauce pan)
-- Timer
-- Spoon for putting tomatoes in jar
-- Rubber tipped tongs (or canning jar grabber thingy. I couldn't find one of those & the rubber-tipped tongs worked pretty well.)

Here's what you do: (from Putting Food By)

Boil enough water to cover your jars & their lids & seals. My pot fits 2 jars, so I put 2 in even though I wasn't sure how many I would need.

When water is boiling, carefully add in jars with lids and seals. Boil for 10 minutes. This sanitizes everything.

Meanwhile, chop your tomatoes & put into a pot. Bring to a boil

.

When tomatoes reach a boil, cook for additional 5 minutes. They'll be cooking more later on, so it's OK if they aren't totally cooked through.

Back to the jars: When your 10 minutes is up, remove them from the water and add 1Tbsp of white vinegar into quart jars & 1/2Tbsp of white vinegar into pint jars. If the tomatoes have cooked for their 5 minutes, spoon into jars with vinegar in them. Leave about 1/2-1 of space in the top of the jar. Seal.

Make sure the large pot of water is back to a boil.

Return jarred, sealed tomatoes to the boiling water and cook for 35 min (pints) or 45 min (quarts)

When that's done, remove from water and let cool (don't put in fridge or anything. Just set aside). When it is totally cool, you shouldn't be able to remove the seal. This means: SUCCESS!

Side notes: I found a tea tray/The-Tray-I \-Eat-In-Front-of-The-TV-On tray lined with a clean kitchen towel a great way to stay organized, move hot jars around the kitchen and minimize mess. I used an oven mitt to lift the cooked, filled jars from the hot water...the tongs were just too cumbersome for this.

Wednesday, August 12, 2009

The Elitism of Heirlooms

Today's Washington Post featured whole section on tomatoes, both the results of their tomato recipe contest and an article about heirloom tomatoes in particular. Timely, given my recent garden update and disappointment at one of my heirloom varieties and total enthusiasm for one of my hybrids.

Heirloom varieties are generally regarded as those that are pre-World War II and are open pollinated. They certainly look different from the more commercial hybrid varieties that are nice red globes, virtually indestructible. Heirloom tomatoes, on the other hand, are often ugly. They are squatty, color streaked, cat-faced, and/or misshapen. The idea is, however, that what they lack in looks, they make up in flavor.

Growing up, I had peripherally heard about heirlooms from cranky old people. But now? Heirlooms are chic. They are pricey. They are Of The Moment. They are the kind of tomato that you would by at Anthropologie, if Anthropologie was a grocery store: folksy, turned fashionable. Much like gardening itself has become recently.

There's also certainly an environmental argument for heirlooms. Preserving the ancestors of tomatoes can ultimately lead to better bio-diversity. Plus, you can save your own seed! Thrifty! And, in a few decades you just might have tomatoes perfectly adapted to your vegetable patch which is very cool.

But, it's my opinion, and that of Ms. Black, that some gardeners/consumers have taken this to the extreme. As I have found out this year with my Wonder Lights, not all heirloom tomatoes are delicious. In fact, due to their rising popularity they are being more commercially produced...something they were not breed to do. And not all hybrids are devoid of flavor (like my darling Sungolds) nor are they a genetically-modified devils. Hybridization can, and does, occur in nature. In fact, heirlooms are really just old hybrids. Genetic modification, on the other hand, is using molecular techniques and not cross-pollination to create a new variety.

As Jay Leno said in an episode of Top Gear about the Prius: "It's about the moral superiority. I'm driving an unattractive car and I am saving the planet. See, in American we like everyone to know the good work we are doing anonymously." Substitute "heirloom tomato" for "car," and I think this also rings true. Right down to the unattractive part.

If you exclusively grow or eat heirloom tomatoes, or any heirloom variety for that matter, this does not make you a superior person. Certainly, seeking out local food sources and different varieties is commendable. Having diversity in your garden is a good thing.

But don't snub a hybrid because it's not an heirloom. That's just like tomato age-ism!

Tell me your favorite variety of tomato. Heirloom or hybrid. What tastes the best and works the best in your garden?

Tuesday, August 4, 2009

Not Awesome News About the Tomatoes

The dude at Merrifield's Plant Clinic used the two dreaded words: "late blight." I've got 2 other tomato plants, both also grown from seed from a freecycler, that are looking pretty ill. I can't find stem lesions on them or the tell-tale white "mold" on their leaves, but it could just be that it's in the early stages. He ruled out Fusarium wilt and early blight and some other fungal diseases. It was basically late blight by elimination. Not exactly a death sentence per se, but I'm not going to wait around to see what happens.

So, my Green Zebra and Cherokee Chocolate tomatoes along with the Mystery Freecycle Heirloom tomato are going directly into trash bags & my gardening gloves are going into the washing machine and any shovels used are getting sanitized. Perhaps this is overkill, but whatever. The Sungold & Wonder Light tomatoes are looking fine (and, tonight I harvested my first Wonder Light!). I'm also a bit concerned about my Cherokee Purple.

But, I don't feel as sad about this as I had expected. We've probably gotten at least 6 pints out of our Sungold tomatoes so far & they are still producing like crazy. This year hasn't be a total loss (especially b/c the Sungold are some of the most delicious tomatoes I've ever tasted!).

Plus, when life gives you late blight, make fried green tomatoes!
(The plants had several full sized but unripe tomatoes on them)

Thursday, July 30, 2009

Recipe: Homemade CSA Veggie Pizza

Two of you asked for my pizza recipe, so here it is! I first started making my own pizza dough b/c I was a poor, single grad student that lived alone. This meant that delivery was often out of my price range and that I had a lot of free time after a long day of studying (last thing I want to do after studying is hang around people. My brain is mush & making conversation just isn't going to happen). So, I started making my own pizza dough and stuffed won tons (for won ton soup). These tedious, repetitive tasks were a nice way for me to relax.

I think this crust is best simply topped with fresh tomato (this time from our CSA & garden!), basil (CSA) and mozzarella (I'll also describe how I do that) but by all means put whatever you want on it!

This makes 2 12-inch pizzas or one very large pizza. I use a KitchenAide Mixer now for the kneading but did it by hand in my grad school days. The good news is that I don't think it's possible to overwork pizza dough, especially by hand, so err on the side of too much rather than too little. This looks time consuming but the total hands-on time is probably close to 30 minutes.

Ingredients:
For dough

1 tsp sugar
1 Tbsp sugar
1.25 c warm water
1 packet of dry yeast
3 c all-purpose King Arthur White Wheat flour, divided (or regular all-purpose flour)
1 Tbsp olive oil
1 tsp salt
Cooking spray

dried oregano, optional
dried basil, optional
garlic powder, optional


For toppings
1-2 large, tomatoes, cored & sliced thin
1 bunch of basil, torn or chopped
salt & pepper
2 cloves of garlic, minced
mozzarella
parm

Directions
  1. Put tap water in Mixer bowl (or other good-sized bowl). This water should be bath-water temperature and not hotter. If it's too hot for you, it's too hot for yeast! Pour in yeast & sugar and dissolve. Let stand 5 minutes. If after 5 minutes there's a bit of foam on top and the mixture smells like bread, your yeast survived. If it doesn't look any different, start over using cooler water.
  2. Lightly spoon in 2.75 cups of the flour, the olive oil, salt and, if you're wanting a flavored crust, now's the time to add in your oregano, dried basil, and/or garlic powder. Oh, and I add in an extra 1 Tbsp of sugar b/c I like sweeter crust a la Pizza Hut (yes. shut up). Stir to combine.
  3. At this point, if you're kneading by hand, dust your work surface (and hands) with flour and turn out the dough. You should knead for about 10 minutes or until the dough is elastic. Add the remaining flour 1 Tbsp at a time, if the dough feels wet. When done, roll dough into a ball, turning the bottom of the ball into itself (kinda like when you converted your Popple back into an innocent-looking "ball").

    If you're using you stand mixer, then just turn on low and then medium speed with your dough hook attachment. I don't leave my mixer for this...the mixer can act like your washing machine when all the towels get on one side! Mix for about 5 or so minutes or until the dough is really elastic, adding in the extra flour 1 Tbsp at a time as needed. When done, roll dough into a ball, turning the bottom of the ball into itself (kinda like when you converted your Popple back into an innocent-looking "ball").

  4. In a large bowl, spray cooking spray. Put dough ball in the bowl and spray the top of it with cooking spray. Put plastic wrap over dough (making contact with the dough itself) and place in a warm spot for an hour. Note: You could totally do the above in the morning & let the dough rise all day. Up until this point, the total hands-on time is about 20ish minutes if you are kneading by hand.


  5. When the dough has doubled, preheat the oven to 450*F, punch it down and spread out to the size of your pizza pan. There are many ways to do this (rolling pin, stretching, throwing up in the air!) so experiment & see what works for you. Put pizza in your pan


  6. Bake the pizza nekkid for 10 minutes.
  7. Meanwhile, drain your marinated tomatoes & dry them off as much as possible.
  8. After the 10 minutes, remove the pizza from the oven & drop the temperature down to 400*F. Top you pizza with whatever you like (I'm doing tomatoes first then mozzarella on top) but leave fresh basil for the end.
  9. Put pizza back into the oven & bake for 20 min or until cheese starts to get golden and the underside of the crust is brown & crispy.
  10. Let pizza cool at least 5 minutes before cutting into it. (Hot cheese is like lava. Trust me on this one!)
Enjoy!

Friday, July 24, 2009

Squirrel-Proof the Tomatoes

Has this happened to you?

You've waited for months for the gorgeous globes of green tomatoes to slowly, but surely, turn a beautiful fire engine red. Daily, your mouth waters at the thought of a ripe, juicy, full of flavor tomato that you have raised from seed. The anticipation, it kills you because you are not an exceptionally patient person to begin with (or perhaps this is me).

Then, one day, you pop out to the garden to check on the ripening progress only to find A STUPID SQUIRREL has meddled (bitten, stolen, whatever) with YOUR tomato. Or maybe it was a bird. It doesn't matter what it was! Your tomato is RUINED! All those days...for nothing.

It's a jungle out there, I tell you.

However, I read somewhere about a great protection system for your tomatoes was using old strawberry, blueberry, or grape tomato plastic clamshells to enclose them. This way air and light can still get in, but critters won't be able to take a bite. Brilliant! Wish it was my idea.

Also, since clamshell packages generally aren't recyclable, this is a great way for them not to go to waste. You can probably even reuse for a few years before they are too brittle.

Downside? They aren't entirely attractive. At all. But I can tolerate a little ugliness in the garden if it'll protect my precious tomatoes.


Here's what you need to do:

Cut a hole on one side of the clamshell container at the edge where it meets the lid. It doesn't really matter what side as long as it's not the hinged one. I did the side parallel to the hinged side:


Then, place the stem of your tomato cluster in the hole you cute & snap the lid close. Ta-da!


I told you it wasn't cute.

Sunday, July 12, 2009

Breaking News: Tomato Blight Hits Big Box Stores


Poor, unsuspecting tomatoes.

The whole story is here: http://www.wusa9.com/rss/local_article.aspx?storyid=88076

The short version? A wholesale seedling distributor sold plants that have been known to carry tomato blight. And, as a result, tomato plants have been pulled from the shelves of Home Depot, Lowes, Wal-mart, etc. For tomatoes, blight is "worse that the Bubonic plague" for humans and was the cause of the 1800s Potato Famine (potatoes & tomatoes are in the same family). Also note that late blight is a death sentence for your tomatoes. But only for tomatoes. For humans, dogs, cats, and ankle-biters (kiddos), it's harmless.

What is late blight?
It's a disease caused by a fungal pathogen. Creepy. Even creepier is that it can overwinter in your soil (via perennial weeds, potato tubers)! The spores can travel (via wind) great distances and with a rainy growing season (like we've had this year), they are more prevalent.

How do I spot late blight?
"The first sign is often brown spots on plant stems, followed by nickel-sized olive-green or brown spots on the tops of leaves and fuzzy white fungal growth underneath. Tomato fruit will show firm, brown spots."

Crap. My tomatoes have late blight? What do I do?!?
Act fast: Destroy all infected plants. Do not put them in your compost, do not let them touch other tomato plants, do not pass go, do not collect $200! Throw the plants away post-haste. And sanitize any shovels/gloves you may have been using to do the deed. Ya know, to prevent infecting additional plants. Also, if your neighbors are growing tomatoes, have them check on their tomatoes. Because the spores can travel in the air, infected tomatoes can devastate your crop, even if you started from seed.


Why hasn't this been talked about more? It is unclear on how widespread this is, but there is certainly the potential to wipe out an entire season of a farmer's crop if s/he bought from the wholesaler/distributor!

Wednesday, June 10, 2009

"Talk to me," says the Tomato

We all know I get too emotionally attached to my plants. I've been known to mourn their death. Curiously, however, I don't really talk to them. Perhaps b/c they don't really talk back. In fact, they just kind of stand there unresponsive. It's totally rude, but they give me food, so I forgive.

Prince Charles, however, begs to differ. The British Royal Horticultural Society is doing a study to see if tomatoes grow better if you talk to them. But, since this is the UK, no mindless American-style convo can do. No sir! The tomatoes must get Shakespeare streamed via an MP3 player attached to their pots. A delicious tomato must be cultured, literally.

Folks, I'm not kidding! Promise!

I'm attempting to reserve judgement until the study's findings are revealed. But, until then, I have allowed myself a little giggle.

Tuesday, February 10, 2009

All About Tomatoes!


Ahhhh....tomatoes. The taste of summer. And homegrown tomatoes or those from the farmer's market TASTE like tomatoes. They SMELL like tomatoes. Those from the grocery store rarely do. Thus, I am a strong proponent of everyone who values all that is juicy, red and delicious in this world devote a corner of their balcony, yard or deck to the honorable tomato! Honestly, it's the thing I look forward to the most out of the garden.

Now, there are 2 basic types of tomatoes: determinate and indeterminate. The determinate varieties are busy & compact. They set fruit within a 2 week period and then start their decline. Here is a selection of determinate seeds. Indeterminate tomatoes are probably what you think of when you envision a tomato plant. This type grows tall and must be supported by a stake, tomato cage or tepee of twigs. Here is a selection of indeterminate seeds.

Growing Requirements
What do tomatoes need to thrive and grow? A good amount of sun, for one thing. Like 6-8 hours of direct light (aka full sun). However, if you're in a hot climate like Florida, you'll need to have partial shade in summer afternoons otherwise your darling tomatoes will get scorched dead. You also need a neutral soil pH (5.5 to 6.8). Most counties, state agriculture departments or universities with a school of agriculture will do soil testing for free or cheap. Otherwise, you can buy a kit online or at your local garden center. For Virginia, here is info on how to submit soil samples. Merrifield Garden Centers and Meadowlark Botanical Gardens definitely have the packet of forms you need.

Plant tomatoes one week after your last expected frost. If you live in a cooler climate you can speed up the warming of the soil by covering the planting site with plastic bags weeks ahead of plant date. If you're starting from seed, sow indoors 6-8 weeks before the last frost date. The packaging of your seeds should say exactly how many days your variety will mature. Rodale (my garden bible) recommends planting 2-4 plants per person.

Hints & Tips
  1. I learned last year tomatoes need a consistent level of moisture. If they go from dry to soaked often they will have poor calcium intake and develop blossom-end rot (a brown mushy part at the bottom of the tomato). To prevent this, mulch & make sure plants are constantly watered and soil has sufficient calcium levels. Adding egg shells will help up calcium content.
  2. Tomatoes in pots require almost daily watering. This is related to #1, but worth calling out on its own. And, if you're wanting to grow your tomatoes in containers, you can use a 5 gallon bucket with a hole drilled in the bottom for drainage or a really big pot.
  3. Birds like red. Or maybe it was a squirrel. But a few lovely, bright red tomatoes had a bite taken out of them/hole poked in. I ended up covering my tomato cages with netting and harvesting fruit just before it was fully vine ripen. I just placed it on my kitchen window (which gets part shade) and it finished ripening in a few days. Less than ideal but you gotta do what you gotta do!
  4. Plant tomatoes deep. If you're buying a tomato plant, strip off bottom leaves and plant it so that it's only ultimately like 4 in. tall. Where the leaves were roots will grow giving you a sturdier plant. You can do this by digging a trench if you're planting in a yard.
  5. Make fried green tomatoes at the end of the season. Here in Arlington it can get cold before the tomatoes are still green. When life gives you green tomatoes, fry them up! I'll share my recipe with y'all when the time comes.