
Know what's not fun? Getting your purse stolen at your neighborhood grocery store while you're strapping your baby into their car seat. It's just unnerving when something like that takes a place you felt safe, ya know? I'm trying to think of this thief as someone that really needs the money and not someone targeting a mother distracted by her child which would just be heartless.
This trip to the grocery was to buy almond extract for Blue Chair Jam's Brandied Cherry Conserve. After all the required calls to credit card companies, filing a police report, and reporting my license stolen, I found comfort in the familiar and repetitive movements of making jam. (And, the Blanquette I had bought to celebrate overcoming an obstacle certainly helped as well, although this instead became a night of celebrating my blessings.)
Do you have the Blue Chair Jam Cookbook? If you've mastered basic jam making, I highly recommend it. The jams are a bit more time consuming and the ingredients are a bit more expensive but the result is a very interesting combination of flavors that turns the most ordinary morning toast a special treat.
My variation of her Brandied Red Cherry Conserve is meant to slap you in the face with cherry flavor. And, it certainly does! Besides being awesome on toast, try swirling this into your morning yogurt, top a bowl of vanilla ice cream or top a pound cake (especially a chocolate one!).
Brandied Cherry Conserve (makes about 6 half pints)
My variation of a Blue Chair Jam recipe
3 lb pitted and stemmed sweet cherries
1 1/4 lb sugar (make sure it's cane sugar...the cheap stuff is usually GMO beet sugar)
3 1/2 oz lemon juice
zest of 2 lemons
2 oz dried currants
1/2 lb dried tart cherries, chopped
2 1/2 oz cherry brandy
3-4 drops of almond extract
3 cloves
Directions
1. Prepare your canner & jars (wash & sterilize them in 10 minutes of boiling water). Keep them in simmering water to stay warm.
2. Combine half the cherries with 10 oz of the sugar & half the lemon juice in a non-reactive pan. Bring to a boil over high heat, stirring often, and cook until the cherries are softened (about 5 minutes). Turn off heat & let the cherries rest for 5 minutes. Using blender/food processor/food mill/immersion blender, puree the mixture & put through a fine mesh sieve, discarding (or eating!) any solids that won't pass through.
3. In a large bowl, mix your cherry puree, the rest of the cherries, the rest of the sugar, the rest of the lemon juice, the dried fruit, lemon zest, brandy and almond extract (so, everything remaining except the cloves). Let sit for 45 minutes at room temperature.
4. Put the macerated mixture back into your non-reactive pot & add cloves (preferable in a tea ball that you can easily get them out). Boil mixture, stirring to prevent sticking. Cook until jam reaches gel point (testing either checking temperature to see if it's 220*F or using frozen spoons/plate). This will be about 20 minutes. When jam has gelled, remove cloves.
5. Fill jars leaving 1/4" head space, wipe rims, screw on lids & process in boiling water bath for 10 minutes. Let sit in bath for 5 minutes, off heat, afterwards & then remove. Check seal after jars have cooled.
Boozy Cherries/Cherry-Infused Brandy (makes 1 quart)
After making above jam, I still had oodles of cherries left over, thanks to Whole Foods' wonderful $2.99/lb organic cherries sale! After the day I had, more booze was necessary. Cherry-infused brandy it is! This will be great to drink as a cordial, spoon over ice cream, use in baking, give as gifts, etc. Plus, it's significantly easier than making jam.
1 lb stemmed cherries (you can pit too, but then you'd need more)
1 3/4c brandy (get mid-grade)
1/4 c sugar
1 thin strip of lemon peel (optional)
Amaretto (optional)
1. Clean & sterilize jar. Wash cherries.
2. Put cherries in jar. Pour over sugar & brandy. If using, add lemon peel and a splash of amaretto (note: Amaretto doesn't, according to my research, have enough alcohol to preserve the cherries, so just use a splash & do not replace the brandy with it). Make sure cherries are completely covered; if not, add more brandy.
3. Place lid & shake to dissolve sugar.
4. Set in a cool dark place for at least 3 months to mature.
Showing posts with label recipe. Show all posts
Showing posts with label recipe. Show all posts
Sunday, July 10, 2011

Wednesday, June 8, 2011
Recipe: Mulberry Jam
 One of the great things about being married to my husband is benefiting from his youth climbing up trees. When most people walk by sidewalks dotted with purple crushed berries, they think "What a mess!" Instead, my husband swings open the door and announces "It's mulberry season!" At my job I noticed a tree loaded with berries and watch the horror on the faces of my coworkers as I walked over and put a few in my mouth. These trees are definitely thought of as a nuisance and not a food source for humans. Silly humans.
I am a mulberry novice. I wasn't entirely sure what a mulberry tree looks like (when they aren't fruiting), which is why I count myself fortunate that my husband does.* These are quite delicious berries; I can see why the birds adore them too. They are intensely sweet and have an almost watermelon-y taste. And, now that I know what to look for, I feel like I'm seeing these trees everywhere. I'd be a fool, though, to tell you my favorite mulberry foraging spots...I get enough competition from birds!
*Please verify the ID of any berry before sampling.
Mulberry Jam (makes 6 half-pints)
(From Ball Complete Book of Home Preserving)
3c crushed & stemmed mulberries
1/2c lemon juice
1 package of powdered pectin
6 c granulated sugar
Directions
1. Prepare canner, jars & lids.
2. Combine mulberries & lemon juice. Whisk in pectin.
3. Boil over high heat. Add sugar & return to boil.
4. Boil hard for 1 minute. Remove from heat; skim off foam.
5. Fill jars/wipe off rim/tighten lid; process in boiling water bath for 10 minutes

Mulberry hands.
Friday, May 13, 2011
Recipe: Kale Colcannon

So, I improvised and the recipe below is still 100% delicious if not a bit blasphemous. I did, however, leave the potatoes unpeeled as I boiled them, which the Irish woman recommends. Probably something more suited for fall (this is seriously comfort in a bowl), but even my little baby licked his bowl clean.
Kale Colcannon (Serves 2)
3 medium-large potatoes (at least the size of your fist)
1 lb kale, de-stemmed and chopped
4 slices of best-quality bacon, diced
4 scallions, finely chopped
1 tbsp butter
Milk
Directions:
1. Place potatoes whole in a pot and cover with cold water. Bring to a boil and cook for 30 minutes or until done. In the last 15 or so minutes, add the chopped kale & a good pinch of salt to the boiling water & cook until tender. Drain.
2. In now-empty pot, render fat from bacon & cook until crispy. Take off heat.
3. Add potatoes (peeled if you like) & kale to bacon. Mash with potato masher. Add butter and enough milk to reach desired consistency. Stir in scallions, adjust seasoning. Eat.
Wednesday, December 8, 2010
Putting Up: Pear Ginger Marmalade
I'm starting to think that what I should have done was freeze things like tomatoes, blueberries and such and save the canning for winter when the extra heat from the stove is welcome and I'm looking for things to do indoors. Live and learn.
I spent Black Friday (um, yeah, this post is a little late) canning Pear Ginger Marmalade (from the *awesome* Ball Complete Book of Home Preserving) and Apple Cider Cardamom Butter with the help of my mom and grandmother. We avoided the insanity of shopping, spent some quality time together and created some delicious spreads that make a simple toasted baguette a gourmet breakfast. I've been hoarding jam since my first batch of Strawberry Balsamic Black Pepper Jam. I'm thinking that the neighbors will be receiving a jar of jam and a bag of homemade granola sometime soon.
This recipe is not only seasonal, but versatile. Sure, you can enjoy or bread or any other baked good, but it would also make a bowl of vanilla ice cream (just warm the jam up first) or a fat slice of brie a bit more special. Enjoy.
Pear Ginger Marmalade (makes 4 half-pint jars)
3 limes or 2 lemons (Note: I doubled the recipe and used a mix of lemons & limes. I found the lemons infinitely easier to peel and the peel seemed to soften up better when cooking)
8 c thinning sliced, cored and peeled ripe pears (I sliced them long-ways, but in future batches, I would make shorter slices as the longer ones can make eating awkward)
4 c granulated sugar (I've heard to not use off-brand sugar as it's often not real cane sugar and that can affect jell. In recipes without pectin, I stay cautious and shell out for Domino or other real cane sugar)
3 tbsp chopped crystallized ginger
1.25 c water
Directions
1. Peel limes/lemons being careful not to get too much pith. Cut peel into very thin strips and set aside.
2. In another container, juice into large non-reactive container, add in pears, sugar and ginger. Toss to combine well. Cover and set at room temperature for an hour.
3. Prepare jars & lids.
4. In small saucepan, add water and peel. Bring to a boil and cook for about 15 minutes. The peel should be tender and most of the water should be reduced.
5. Bring pear mixtures to a full boil for 15 minutes, stirring frequently. If desired, use immersion blender for a few pulses to puree some of the pears. Add peel and boil until mixture reaches gel stage, about 5 minutes (Note: Mine did not reach gel stage after 5 minutes. It took more like 20 and that was still iffy. However, once it cooled, it was perfect).
6. Ladle into hot jars, remove air bubbles, wipe down rim and put on lids. Process in boiling water for 10 minutes. Wait 5 minutes, then remove jars, cool and test seal.
I spent Black Friday (um, yeah, this post is a little late) canning Pear Ginger Marmalade (from the *awesome* Ball Complete Book of Home Preserving) and Apple Cider Cardamom Butter with the help of my mom and grandmother. We avoided the insanity of shopping, spent some quality time together and created some delicious spreads that make a simple toasted baguette a gourmet breakfast. I've been hoarding jam since my first batch of Strawberry Balsamic Black Pepper Jam. I'm thinking that the neighbors will be receiving a jar of jam and a bag of homemade granola sometime soon.
This recipe is not only seasonal, but versatile. Sure, you can enjoy or bread or any other baked good, but it would also make a bowl of vanilla ice cream (just warm the jam up first) or a fat slice of brie a bit more special. Enjoy.
Pear Ginger Marmalade (makes 4 half-pint jars)
3 limes or 2 lemons (Note: I doubled the recipe and used a mix of lemons & limes. I found the lemons infinitely easier to peel and the peel seemed to soften up better when cooking)
8 c thinning sliced, cored and peeled ripe pears (I sliced them long-ways, but in future batches, I would make shorter slices as the longer ones can make eating awkward)
4 c granulated sugar (I've heard to not use off-brand sugar as it's often not real cane sugar and that can affect jell. In recipes without pectin, I stay cautious and shell out for Domino or other real cane sugar)
3 tbsp chopped crystallized ginger
1.25 c water
Directions
1. Peel limes/lemons being careful not to get too much pith. Cut peel into very thin strips and set aside.
2. In another container, juice into large non-reactive container, add in pears, sugar and ginger. Toss to combine well. Cover and set at room temperature for an hour.
3. Prepare jars & lids.
4. In small saucepan, add water and peel. Bring to a boil and cook for about 15 minutes. The peel should be tender and most of the water should be reduced.
5. Bring pear mixtures to a full boil for 15 minutes, stirring frequently. If desired, use immersion blender for a few pulses to puree some of the pears. Add peel and boil until mixture reaches gel stage, about 5 minutes (Note: Mine did not reach gel stage after 5 minutes. It took more like 20 and that was still iffy. However, once it cooled, it was perfect).
6. Ladle into hot jars, remove air bubbles, wipe down rim and put on lids. Process in boiling water for 10 minutes. Wait 5 minutes, then remove jars, cool and test seal.
Wednesday, October 27, 2010
Recipe: Vegetarian Cassoulet
 I know, I know. Vegetarian cassoulet is an oxymoron. Cassoulet, after all, is famous for using duck confit & often an assortment of sausages. My husband & I got a little cassoulet obsessed during our trip to Languedoc this year. It gave us both heartburn, but it was fantastic.
But, to be honest, I'm not going to be making my own duck confit anytime soon nor am I even sure where to get it locally. And, I don't have a few days to make one dish. Thus, while this dish may not be authenic, it is delicious and replicates the flavors of the original. It's a perfect fall or winter dish...you can serve by itself or with a salad and crusty bread. And maybe some Blanquette wine if you can find it!
Ingredients (Serves 4)
Adapted from Epicurious.com
6 scallions (all) or 3 medium leeks (white and pale green parts only), thinly sliced
4 medium carrots, finely diced
3 celery ribs, finely diced (I didn't put this in as I couldn't find any locally, but it would be a delicious addition) 4 garlic cloves, chopped
2 roma tomatoes, finely diced
8 oz mushrooms, finely diced
Wednesday, October 20, 2010
Recipe: Roasted Vegetables & Wheatberry Salad
 I've been wanting to use the wheatberries I bought on a whim a while ago and this week was the week!
I used this recipe as the base. I'm sure it's good as is, but I prefer roasted vegetables first coated in vinegar and had been meaning to make roasted, crispy kale. When I can use non-local ingredients, I will add some plumped raisins or dried cranberries like the inspiration recipe. The sweet hit would be nice.
However, the recipe below is addictive. I never thought I would say that about root vegetables, let alone wheatberries, but there's something about it that is SO GOOD. Maybe it's because the wheatberries are slightly chewy and nutty? That the root vegetables roasted with thyme make you think of fall? Whatever it is, this is good hot, cold and room temperature. Perfect for lunch, a side to roasted chicken or potluck dish.
Ingredients
2 cup wheat berries
2 pounds assorted root vegetables; carrots, rutabagas, butternut squash, celery root, parsnips, etc, peeled and cut into thumbnail-sized cubes (I used carrots, parsnips & turnips)
1/2 large red onion, peeled and diced
1 bunch of kale, chopped
Olive oil
2 Tbsp balsamic vinegar
10 or so branches of fresh thyme
salt and freshly-ground black pepper
Directions
1. Cook the wheatberries according to package instructions. Preheat oven to 425*F
2. Meanwhile, toss the chopped root vegetables in as much oil as you dare (I do just a Tbsp) and the vinegar. Put on a roasting sheet topped with the thyme sprigs and sprinkled with salt & pepper. Roast for 20-30 minutes, until done.
3. Turn down the temperature of the oven to 300*F. Toss the kale with a little oil (I just put a few drizzles) and then spread in a single layer on roasting sheet. Bake for 20-25 minutes. (Alternatively, you could steam the kale, but I like the charred flavor the oven gives the tips)
4. Toss cooked wheatberries with roasted root vegetables and kale.
Monday, October 18, 2010
Recipe: Sunday Pot Roast with Double Potato Mash

I used this as my base recipe for the pot roast except I added 3 finely chopped roma tomatoes after the onions were cooked and caramelized them. I added several parsnips and turnips, peeled and cut itno sticks with 30 minutes to go and trimmed green beans with 10 minutes to go.
I've been striving to emulate the English Sunday Roast. Nothing is lovelier, especially in this weather, than a comforting dish of something that has been cooked slow and low. Add in a glass of wine and you've got a dinner to linger over...as long as the baby allows. :P Lucky for me, Sprout seems to enjoy the idea of a Sunday Roast as much as I do.
Double Potato Mash
4 small sweet potatoes, peeled & cubed
6 medium white potatoes, cubed (I like to leave the skins on my white potatoes. Cut these slightly larger than the sweet potatoes as they cook faster)
Salt
Water
1 Tbsp butter
1/2 c 2% milk
Directions
1. Put both potatoes in a large sauce pan. Cover with water and add a liberal pinch of salt.
2. Bring to a boil and cook until the potatoes are tender (time depends on the size you cut the potatoes, but it took me 10 minutes)
3. Drain
4. In the sauce pan, add the pat of butter. Add the drained potatoes and milk. Mash with potato masher.
5. Top with gravy or pot roast of your choice!
Wednesday, October 6, 2010
Recipe: African Peanut Soup

After I made this, I pondered if fresh ginger counted as a seasoning or a vegetable...meaning, is using non-local ginger a cheat in my local eating challenge? I think of it more as a seasoning b/c I don't recall are recipe where you *just* eat ginger. And it stores well. Hmmmmmm...Does ginger even grow in the greater DC area?!?
Source: Vegetarian Planet by Didi Emmons
Ingredients (Serves 4-6)
1 tbsp oil
1 large onion, chopped
2 garlic cloves, minced
2 tsp grated fresh ginger
1.5 tsp ground cumin
1.5 tsp ground coriander
1/2 tsp ground cinnamon
1 pinch of ground cloves
3 ripe medium tomatoes, chopped
2 large (or about 1.5 lbs) sweet potatoes, peeled & chopped (I'd leave the peel on if you're doing a stew version of this for extra nutrients)
1 carrot, chopped
4.5 c water
salt
1 pinch cayenne pepper
1/4 c chopped, dry roasted, unsalted peanuts
3 tbsp creamy peanut butter (Ms. Emmon's recipe calls for 2 tbsp, but I think a little extra is needed)
1 tbsp chopped cilantro, optional
Directions
1. In soup pot, heat a bit of oil over medium heat and saute onion for about 10 minutes or until brown around the edges.
2. Add ginger, garlic and spices. Cook for another 3 minutes.
3. Add tomatoes, sweet potatoes and carrot. Cook for 5 minutes.
4. Add water and a good pinch of salt. Bring to a boil and cook 30 min. or until sweet potatoes and carrots are tender.
5. Add peanut butter.
6. With immersion blender, puree until smooth. (You can also use food processor or blender, but do not fill the containers all the way when you blend--warm liquid expands! It might be safer to let it cool a bit too before you puree).
7. Add peanuts & top with cilantro (if using). Enjoy!
Tuesday, October 5, 2010
Recipe: Butternut Squash & Greens Risotto
I would have never thought to put greens in risotto if it wasn't for the Moosewood Restaurant Low-Fat Favorites cookbook. This was a delicious hearty meal best washed down with a lovely apple cider (Or hard cider if you wish!).
This is the first recipe of my Local Eating Challenge & I'll admit that I cheated a bit. I know, first meal and you cheat?!? Hear me out! The purpose of this challenge is not only to get more acquainted with where my food comes from, but also lessen the environmental impact of our stomach. Thus, just letting 3 carrots, some celery and half of a bag of onions that I had leftover from last week go bad seemed to the wrong choice to stay true to the spirit of the challenge. So, I chopped all those up with additional carrots from the farmer's market today, garlic that I grew myself, salt, peppercorns and bay leaves, and turned it into a very flavorful vegetable stock for this recipe. The rest of the vegetables in the recipe, along with the rest of the vegetables this month, will be from local sources. Promise.
You could totally stop with just adding the greens; it's a delicious risotto without the squash. I used kohlrabi greens because I bought kohlrabi, but the original recipe called for kale and said Swiss chard was an option too.
Ingredients (Serves 4)
5 c vegetable stock
1 c minced onions
2-3 tsp olive oil
1.5 c arborio rice
about 2 c peeled & cubed butternut squash, cooked (either roasted or steamed)
3 c stemmed and chopped greens (kale, Swiss chard, or kohlrabi greens)
salt & pepper
1/4 c Parmesan cheese
Directions
1. Bring stock to a boil in a saucepan.
2. Meanwhile, saute onions in the oil for about 5 minutes...until softened but not brown.
3. Add rice to the pan and toast, stirring occasionally. Add 1/2 of the stock.
4. Stir often until all of stock is absorbed. Add greens.
5. Add an additional 1/2 c, stir and wait until absorbed by adding more liquid. Keep adding liquid this way until the rice is done or all the liquid is used.
6. Add Parmesan, cooked butternut squash and serve!
This is the first recipe of my Local Eating Challenge & I'll admit that I cheated a bit. I know, first meal and you cheat?!? Hear me out! The purpose of this challenge is not only to get more acquainted with where my food comes from, but also lessen the environmental impact of our stomach. Thus, just letting 3 carrots, some celery and half of a bag of onions that I had leftover from last week go bad seemed to the wrong choice to stay true to the spirit of the challenge. So, I chopped all those up with additional carrots from the farmer's market today, garlic that I grew myself, salt, peppercorns and bay leaves, and turned it into a very flavorful vegetable stock for this recipe. The rest of the vegetables in the recipe, along with the rest of the vegetables this month, will be from local sources. Promise.
You could totally stop with just adding the greens; it's a delicious risotto without the squash. I used kohlrabi greens because I bought kohlrabi, but the original recipe called for kale and said Swiss chard was an option too.
Ingredients (Serves 4)
5 c vegetable stock
1 c minced onions
2-3 tsp olive oil
1.5 c arborio rice
about 2 c peeled & cubed butternut squash, cooked (either roasted or steamed)
3 c stemmed and chopped greens (kale, Swiss chard, or kohlrabi greens)
salt & pepper
1/4 c Parmesan cheese
Directions
1. Bring stock to a boil in a saucepan.
2. Meanwhile, saute onions in the oil for about 5 minutes...until softened but not brown.
3. Add rice to the pan and toast, stirring occasionally. Add 1/2 of the stock.
4. Stir often until all of stock is absorbed. Add greens.
5. Add an additional 1/2 c, stir and wait until absorbed by adding more liquid. Keep adding liquid this way until the rice is done or all the liquid is used.
6. Add Parmesan, cooked butternut squash and serve!
Sunday, September 26, 2010
Recipe: Eggplant & Tomato Gratin
I still can't pass by the tomatoes and eggplant at the farmer's market, which means I'm still looking for new and delicious ways to keep them interesting.
 Now when I think of "gratin" I think of potatoes in cream topped with cheese or bread crumbs. So I was suspicious when I came across recipes for "Tomato Gratin" (Did that mean tomatoes baked in cream & topped with breadcrumbs?!? That sounds like a soupy mess!) or "Eggplant Gratin" or, even worse, "Tomato and Eggplant Gratin." However, it appears that "gratin" is a fancy-pants way of saying "casserole topped with cheese and/or breadcrumbs."
Casseroles I can do!
Below is a much healthier hybrid of all the recipes I found. This would be good with zucchini instead of the eggplant if you're one of those eggplant haters. If you are worried about the water content in the tomatoes, you can de-seed them but I used very meaty heirloom varieties that did not shed too much juice. You could serve this as a side dish or a vegetarian main course. However you eat it, you'll find yourself making it often when tomatoes and eggplants are at their peak.
Ingredients (Serves 4-6)
2 medium-large eggplant, sliced 1/4" thick
3 large tomatoes, sliced 1/4" thick
4 cipollini onions or 1 medium onion, sliced thin
olive oil
salt & pepper
1/2 c grated parm
1/2 c grated mozzarella
1.25 c panko breadcrumbs
1/4 c mixed fresh woody herbs, chopped (I used 2 sprigs of rosemary, 2 sprigs of oregano and the rest thyme)
Directions
1. Preheat oven to 375*F.
2. Lightly oil the bottom of a 8x13in casserole. Put half of the eggplant in one layer & season it with salt and pepper. Top with half of the onions. Next, place half of the tomatoes on top of onions and top with 1/3 of the chopped herbs and a bit of salt and pepper.
3. Repeat for the next layer.
4. Top final layer of tomatoes with the mozzarella.
5. Mix the remaining herbs with the parm, breadcrumbs and about 2 tsp of olive oil. Spread the mixture evenly over the mozzarella cheese.
6. Bake for 55-65 minutes or until eggplant is tender and the topping is golden brown (cook longer if you sliced your eggplant thicker).

Casseroles I can do!
Below is a much healthier hybrid of all the recipes I found. This would be good with zucchini instead of the eggplant if you're one of those eggplant haters. If you are worried about the water content in the tomatoes, you can de-seed them but I used very meaty heirloom varieties that did not shed too much juice. You could serve this as a side dish or a vegetarian main course. However you eat it, you'll find yourself making it often when tomatoes and eggplants are at their peak.
Ingredients (Serves 4-6)
2 medium-large eggplant, sliced 1/4" thick
3 large tomatoes, sliced 1/4" thick
4 cipollini onions or 1 medium onion, sliced thin
olive oil
salt & pepper
1/2 c grated parm
1/2 c grated mozzarella
1.25 c panko breadcrumbs
1/4 c mixed fresh woody herbs, chopped (I used 2 sprigs of rosemary, 2 sprigs of oregano and the rest thyme)
Directions
1. Preheat oven to 375*F.
2. Lightly oil the bottom of a 8x13in casserole. Put half of the eggplant in one layer & season it with salt and pepper. Top with half of the onions. Next, place half of the tomatoes on top of onions and top with 1/3 of the chopped herbs and a bit of salt and pepper.
3. Repeat for the next layer.
4. Top final layer of tomatoes with the mozzarella.
5. Mix the remaining herbs with the parm, breadcrumbs and about 2 tsp of olive oil. Spread the mixture evenly over the mozzarella cheese.
6. Bake for 55-65 minutes or until eggplant is tender and the topping is golden brown (cook longer if you sliced your eggplant thicker).
Thursday, September 16, 2010
Recipe: Squash & Corn in Coconut Milk with Thai Basil
Let me preface this by saying this is incredibly delicious. Like, so good that I'm sad that summer squash season is winding down. And, so good that I ate it and totally forgot to take a picture! You'll just have to imagine shockingly yellow summer squash (I don't know the variety!) and pale yellow corn kernels in a pool of white coconut milk and flecked with green bits of cilantro and hot peppers. Ahhhhhh..
Another plus is that the dish comes together crazy fast if you've got leftover cooked chicken or picked up a rotisserie chicken from the grocery store.
More to the point: This is the perfect recipe to bridge summer and fall. Not only are squash, corn, hot peppers, thai basil and cilantro all available at the farmer's market right now, but this dish is light, yet as comforting as a bowl of a more fall-ish stew. I suppose you could say this is "comfort food," summer style!
The recipe comes from Deborah Madison via The Washington Post. They took a picture, but my dish was prettier.
3 medium squash, cut into 1/2-inch dice (about 3 cups)
1 medium onion, cut into small dice
Kernels from 2 ears of fresh corn
2 to 4 jalapeño peppers, stemmed, seeded and minced (I used my kung pao peppers & didn't seed them)
3 medium cloves garlic, minced
1/2-inch piece peeled ginger root, minced (I grated this with a Microplane)
5 scallions, white and light-green parts only, cut crosswise into thin slices
15 ounces (1 can) low-fat coconut milk
1/2 cup water
1/4 cup chopped cilantro, plus more for optional garnish
1/4 cup chopped Thai basil, plus more for optional garnish
Salt
Freshly ground black pepper
1 cup shredded cooked chicken (optional)
3 cups cooked basmati rice, warmed, for serving
2. Add the corn, hot peppers, garlic, ginger and scallions to the pan, stirring to incorporate. Once incorporated (so, these aren't really sauteing), stir in the coconut milk and water, then add the cilantro and basil.
3. Season with salt and pepper to taste.
4. Cook for 3 to 5 minutes, until the corn is heated through. Add the chicken, if desired, and stir to incorporate.
5. Serve over rice.
Another plus is that the dish comes together crazy fast if you've got leftover cooked chicken or picked up a rotisserie chicken from the grocery store.
More to the point: This is the perfect recipe to bridge summer and fall. Not only are squash, corn, hot peppers, thai basil and cilantro all available at the farmer's market right now, but this dish is light, yet as comforting as a bowl of a more fall-ish stew. I suppose you could say this is "comfort food," summer style!
The recipe comes from Deborah Madison via The Washington Post. They took a picture, but my dish was prettier.
Ingredients:
1 tablespoon vegetable oil3 medium squash, cut into 1/2-inch dice (about 3 cups)
1 medium onion, cut into small dice
Kernels from 2 ears of fresh corn
2 to 4 jalapeño peppers, stemmed, seeded and minced (I used my kung pao peppers & didn't seed them)
3 medium cloves garlic, minced
1/2-inch piece peeled ginger root, minced (I grated this with a Microplane)
5 scallions, white and light-green parts only, cut crosswise into thin slices
15 ounces (1 can) low-fat coconut milk
1/2 cup water
1/4 cup chopped cilantro, plus more for optional garnish
1/4 cup chopped Thai basil, plus more for optional garnish
Salt
Freshly ground black pepper
1 cup shredded cooked chicken (optional)
3 cups cooked basmati rice, warmed, for serving
Directions:
1. Heat the oil in a large skillet over medium heat. Add the squash and onion; cook for about 6 minutes, until tender. If anything, under cook the squash slightly as it will have a few more minutes cooking in the coconut milk.2. Add the corn, hot peppers, garlic, ginger and scallions to the pan, stirring to incorporate. Once incorporated (so, these aren't really sauteing), stir in the coconut milk and water, then add the cilantro and basil.
3. Season with salt and pepper to taste.
4. Cook for 3 to 5 minutes, until the corn is heated through. Add the chicken, if desired, and stir to incorporate.
5. Serve over rice.
Tuesday, September 14, 2010
Recipe: Stuffed Eggplant

In theory, this is glorious as it's far easier to make in-season fruits and vegetables taste good. Really, it's the lazy way to eat. However, the reality, as I discovered last year with my CSA, is that you run out of tried & true recipes and ultimately get sick of tomatoes, eggplant, squash, corn, green beans and peppers. It's safe to say that I'm currently at the end of my recipe rope at this point.
Staying home with the baby has allowed me to watch more cooking shows. After all, one can only rock a restless cherub for so long in silence. On one such occasion I stumbled upon this recipe by Michael Chiarello: Mom's Stuffed Eggplant. I'm sure his recipe is good as-is, but I made some changes reflected in the recipe below (I also doubled it so we'd have leftovers).
Ingredients (Serves 12 as a side dish; 6 as a main course)
6 small/personal-sized eggplant
2 Tbsp olive oil
1 lb ground beef
2 onions, small diced
3 Italian peppers, small diced (about 2 bell peppers would work too)
6 cloves garlic, minced
1 c basil leaves, chopped
2 tsp crushed red pepper
1 cup Parmigiano Reggiano
1/2 c unseasoned bread crumbs (I used panko)
2 eggs, slightly beaten
3 chopped tomatoes
Directions
1. Preheat oven to 350*F.
2. Scoop out insides of eggplant leaving enough flesh so that it will serve as a stable "cup" for the filling. Put the flesh in a pot of boiling water & cook for 10-12 minutes or until soft.
3. Meanwhile, in a skillet heat the oil with the crushed red peppers and saute the peppers, onions and garlic until softened. Add beef and cook until browned. Next, add tomatoes, Parm and basil. Remove from heat.
4. When eggplant is done, drain & add to skillet, breaking up pieces as necessary.
5. Taste filling for seasoning and add salt/pepper as necessary.
6. Add egg and bread crumbs to skillet.
7. Fill eggplant cups with the filling and top with Parm (if desired).
8. Bake for about 50 minutes. Rotate pan halfway through baking if your oven has hot/cold spots.
9. Enjoy as a one-pot meal or a side dish!
Friday, September 10, 2010
ISO The Perfect Pickle Recipe
 And by "pickle," I'm referring to cucumber pickles here. I love pickles. Partly because I love all things vinegary, salty and crunchy. Like salt & vinegar chips. (Pickles are healthier, though!) Thus, I am on the quest for the perfect pickle recipe.
Last year I made a recipe from Putting Food By that was good, but wasn't my idea of the "perfect" pickle. Too sweet.
This year I used my Edmonson pickling cukes (they are white variety) and a recipe from Ball Complete Book of Home Preserving. They are also quite good and are getting closer to what I am after, but not quite. In fact, I'd probably make the recipe again (maybe adding a dried chili to the jar)
Next year I plan to do multiple recipes early in the season and do a taste test to pick my favorite. The Ball recipe below will probably be my basis for this.
Ingredients (Makes about 3 quarts)
3 Tbsp pickling spice
4 c vinegar (I used white, Ball recommends cider. Both are at least 5% acidity)
4 c water
3/4 c granulated sugar
1/2 c pickling or canning salt (I got this at a local hardware store)
3 bay leaves
3 garlic cloves
2.5 tsp mustard seeds
~3.5 lbs pickling cucumbers, trimmed and cut into spears (try to make sure all the spears are the same size)
Ball Pickle Crisp, optional
Directions
1. Sanitize jars and lids.
2. Put the pickling spice in cheesecloth (or a large tea ball) and place in a sauce pot with the vinegar, water, sugar and salt. Boil for about 15 minutes, stirring to dissolve salt and sugar.
3. In each jar, put 1 bay leaf, 1 garlic clove, and 1 tsp of mustard seed. Pack in cucumber spears, leaving 1/2-in on top of the jar. If using Pickle Crisp, add that according to package instructions.
4. Ladle hot pickling liquid in jars, keeping 1/2-in of headspace in the jar. Remove air bubbles and screw on lids.
5. Process in boiling water bath for 15 minutes. Wait to eat for a least a week for flavors to develop.
Sunday, August 29, 2010
Recipe: Nicoise-style Potato Salad
 You hear it everywhere: Fresh. Local. Sustainable.
These three words are said so often together that it's almost a cliche. I mean, who wants to eat something described as rotten, shipped 5,000 miles and planet-killing? However, for this recipe "fresh. local. sustainable" actually is rather fitting.
Now, I've seen enough Masterchef to know that you don't call an interpretation of a classic dish by it's name, especially if you leave out ingredients. Hence the name: Nicoise-style Potato Salad. I don't like hardboiled eggs and we were out of capers and anchovies. Oh, and I replaced the tuna with a more sustainable Maine-caught smoked mackerel (which you should really try if you haven't already, by the way.). Because lettuce is not in season right now, that went too. And, finally, I mixed it all together instead of making it a composed salad. Whoops.
This isn't really a recipe as you can ultimately add or subtract whatever you have on hand or like/dislike, put more or less dressing, etc.
Ingredients (Serves 4 hungry adults for dinner)
5-7 new potatoes, cut into bite-sized pieces
1/2-3/4 lb green beans
handful of olives (I used nicoise & kalamata)
1/2 lb black-eyed or other field peas (untraditional optional), cooked
1 pint cherry tomatoes, halved
1/4 c chopped mixed herbs (I did a 50/50 mix of french thyme and greek mountain oregano from my garden, but chives or parsley would also be nice)
For the vinaigrette:
1/4 c red wine vinegar (I think a 50/50 split of oil & vinegar is nice here to brighten up the potatoes)
1/4 c good quality olive oil (Like, nicer than the stuff you cook with. It's important here)
1/2-1 red onion, sliced thin
1 tsp dijon mustard
Salt & pepper
Directions:
1. Toss all the ingredients together for the vinaigrette. Let sit for as long as possible, ideally at least 1 hour until the onions are softened.
2. Place cut potatoes in a large saucepan. Cover with water and add salt. Bring to a boil & cook until potatoes are tender when pierced with a knife (mine took about 5 minutes).
3. Add green beans to the pot and cook until tender-crisp (mine took about 2-3 minutes)
4. Drain potatoes and beans. Quickly add tomatoes, herbs and peas and then toss with vinaigrette. Serve with smoked mackerel and crusty bread, if desired.
Friday, August 20, 2010
Recipe: Edisto Tomato Pie
 This recipe comes to you via my internet friend that lives in RoVA. As you may know, NoVA (Northern Virginia) is not really part of the deep south like the rest of the state (RoVA). As such, you'll find fewer casseroles served up dinner round these parts and you'll certainly find less use of mayo in cooking.
I know what you're thinking: "Warm mayo sounds foul." I once shared your beliefs until I found out some of my favorite casseroles included mayo. I had been eaten warm mayo! And lived to tell the tale!!
Thus, if you find yourself with a ridiculous amount of tomatoes and are willing to be brave, I urge you to give this recipe a shot. I doubled the recipe below, used Pilsbury pre-made pie dough & threw in into a baking dish instead of a pie plate. It would be especially nice served up with fresh field peas or butter beans (cooked with bacon or ham hocks, of course!).
Ingredients (Serves 6)
1 deep dish pie crust, pre-baked for 10 minutes at 375*
5 large tomatoes, cored & thickly sliced
1/2 tsp salt
1/2 tsp black pepper
1 tsp garlic powder
4 tsp of your choice: dried basil, dried thyme, dried oregano or mixture of all 3 (I did an equal part mix of all 3)
3/4 c mayo
1.25 c shredded sharp cheddar cheese
Directions
1. Turn down oven to 350*
2. Mix salt, pepper, garlic powder & herbs in a bowl.
3. Arrange one layer of tomatoes in pie shell. Sprinkle over with seasoning mixture. Repeat until all tomatoes are used. (I left the ends of the tomatoes for the top.)
4. Mix mayo & cheese in a bowl. Top pie with mixture.
5. Bake for 35 minutes or until bubbly and brown. Let stand 5 minutes before serving.
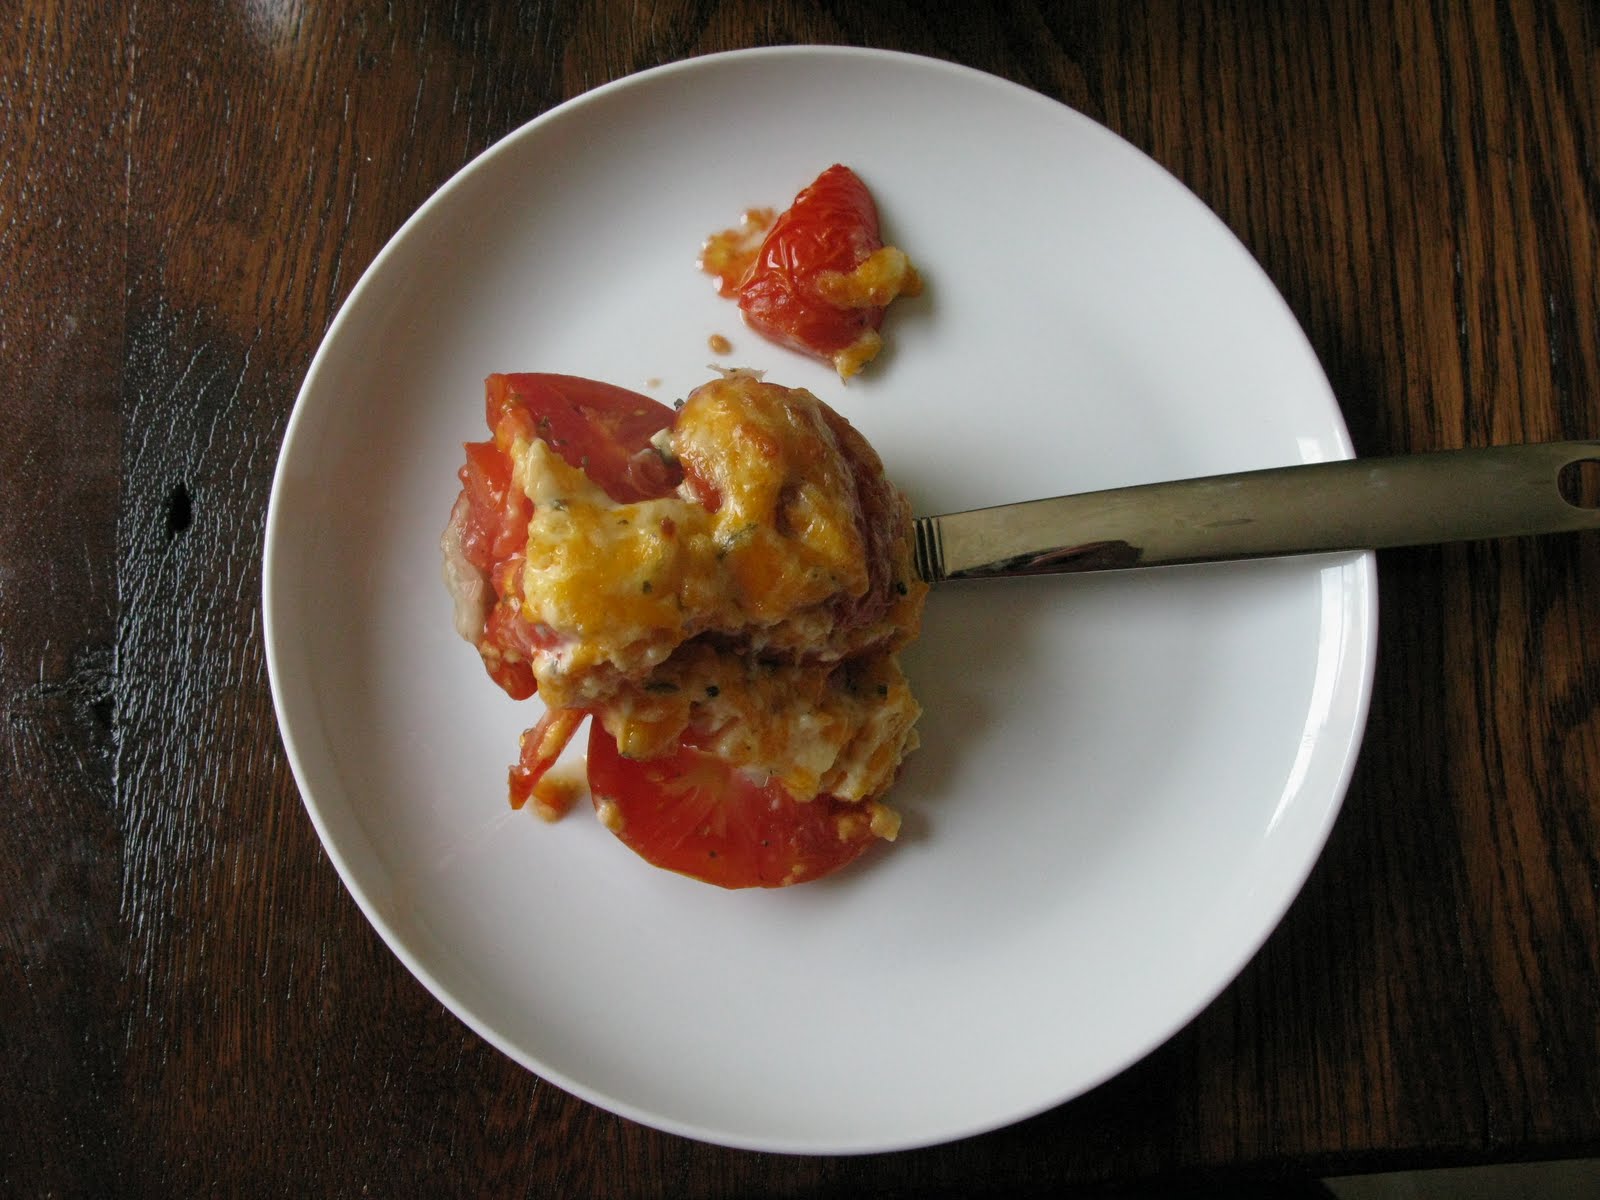 Looks harmless & delicious, right? That's because warm mayo is neither scary nor gross.
 See? Told you! Delicious!
Thursday, August 19, 2010
Recipe: Gazpacho
 The tomato saga continues...
I never liked gazpacho even though I never had it. Cold soup? Blech! Don't need a taste to figure out that would be g-r-o-s-s. Not to mention I went through a finicky stage with tomatoes (no chunks of tomatoes in pasta sauce, but I could eat them on a sandwich or salad no problem) in my youth. As I, and my tastes, matured, gazpacho fell off my radar.
Until my husband & I spent our first anniversary exploring the Andalucia region of Spain. In a fantastic tapas bar in Granada, you got a "free" tapa with each drink order. The "free" tapa the day we went was gazpacho. (Note that I rarely turn down free food, no matter if I'll like it or not.) I took a hesitant bite....it was *delicious*! And perfect for the hot weather. What was wrong with me & why hadn't I given this a try earlier???!!?? (Don't answer that.)
This recipe is a Jose Andres incarnation. Except mine doesn't look as pretty as I just topped it with freshly cracked black pepper and fleur de sel. And doesn't have sherry or sherry vinegar. I completely omitted the sherry as I don't drink it & wasn't going to buy a bottle of the good stuff (simple recipes are not the place to use suboptimal ingredients). I substituted red wine vinegar for the sherry vinegar as some of my tapas cookbooks had that in their recipe. Thus, I feel that substitution is legit. Serve this with little garlic toasts.*
Word on the interwebs is that pureed gazpacho like this freezes OK. Not sure this stuff will last that long, but if I give it a try, I'll update this post.
Ingredients (serves 6-8)
1/2 English/hothouse cucumber, peeled and chopped
1 green bell pepper, seeded and diced
3 pounds ripe tomatoes, diced
2 garlic cloves
1/4 cup red wine vinegar
3/4 cup good quality extra-virgin olive oil
Directions
1. Throw everything in the blender or food processor and puree until smooth. (Note: that this almost exceeded the capacity of my 9 cup food processor, so you may want to do in batches)
2. If desired (I didn't do this), pour through mesh sieve into serving vessel (pitcher, bowl, etc.)
3. Refrigerate for at least 30 minutes for flavors to combine.
4. Top with salt & pepper or Jose's fancy, schmancy toppings
*Slice crusty bread & toast both sides. While still warm, take a garlic clove & rub one side of each toast. Season with salt & pepper (this is critical).
Wednesday, August 18, 2010
Recipe: Pasta with Raw Tomato Sauce

This was the first recipe my husband ever gave me. You see, we met over the interwebs and in one of his emails he raved about what he recently made with a bunch of tomatoes. Except, his directions left me a bit confused & I made it wrong. And it was so gross.
Luckily, he redeemed himself shortly afterwards with a delicious dinner of puttanesca with prosecco-soaked berries topped with cassis for dessert. :::swoon:::
Anyway, back to *this* recipe...
Made properly, this is remarkably good and an excellent choice for a potluck or picnic. And, by "properly" I don't just mean technique; this recipe is so simple that you really need fresh, perfectly ripe tomatoes, tender basil and quality olive oil. The other keys, are to use the proper amount of oil even though it's kind of alarming and to let the mixture marinate as long as possible. You see, the tomato juices and olive oil make kind of a vinaigrette which forms the "sauce." I like using more acidic tomatoes for this, rather than sweeter ones. Additionally, if you aren't a fan of the garlicky bite, then pop a few of your garlic cloves into the pasta pot for the last few minutes of cooking.
Ingredients (Serves a crowd)
3 lbs of tomatoes, chopped
4-5 cloves of garlic, finely minced
3/4 cup of good extra virgin olive oil
1 large bunch of basil, leaves torn
Salt & Pepper
2 lbs of farfalle (or other fun pasta shape)
Directions
1. Mix first four ingredients together in a large bowl. Salt and pepper to taste. Let marinate in the refrigerator for at least 2 hours.
2. Prepare pasta according to box directions.
3. Combine hot pasta with cool tomato sauce.
4. Devour. Possibly right out of the pan.
Tuesday, August 17, 2010
Recipe: Hot Tomato & Pepper Sauce/Salsa
In theory, this is supposed to be a salsa. But thanks to me using my bumper crop of kung pao peppers (and only de-seeding half) this turned into quite the spicy condiment. Because I didn't use paste tomatoes it was kind of thin out of the pot to be what most Americans would consider to be a salsa, but it thickened up when I canned it. Either way, it is wicked good. I can't wait to try it on tacos. Or greens. Or tortilla chips. Or anywhere I want a spicy, vinegary kick.
This recipe is from Ball Complete Book of Home Preserving. I *highly* recommend this book for all things canning. There are loads of delicious recipes and good explanations of canning techniques.
 Ingredients (Makes 2-3 pints)
3 cups chopped tomatoes
3 cups chopped peppers (I used 1 bell pepper & the rest kung pao, with half of the kung pao seeded & the other half with the seeds intact. Ball's recipe uses seeded jalapenos.)
1 cup chopped onion
1 cup cider vinegar
6 cloves garlic, finely minced (from my garden!!)
2 tsp dried oregano
1.5 tsp salt
1/2 tsp ground cumin
Directions
1. In large sauce pan, combine all ingredients. Bring to boil over medium-high heat, stirring occasionally.
2. Reduce heat to gentle boil and cook until slightly thickened, about 10 minutes or so.
3. If you want to preserve, you may either can this recipe (using sterilized cans & processing pints in a boiling water bath for 15 minutes) or freeze cooled sauce.
This recipe is from Ball Complete Book of Home Preserving. I *highly* recommend this book for all things canning. There are loads of delicious recipes and good explanations of canning techniques.
 Ingredients (Makes 2-3 pints)
3 cups chopped tomatoes
3 cups chopped peppers (I used 1 bell pepper & the rest kung pao, with half of the kung pao seeded & the other half with the seeds intact. Ball's recipe uses seeded jalapenos.)
1 cup chopped onion
1 cup cider vinegar
6 cloves garlic, finely minced (from my garden!!)
2 tsp dried oregano
1.5 tsp salt
1/2 tsp ground cumin
Directions
1. In large sauce pan, combine all ingredients. Bring to boil over medium-high heat, stirring occasionally.
2. Reduce heat to gentle boil and cook until slightly thickened, about 10 minutes or so.
3. If you want to preserve, you may either can this recipe (using sterilized cans & processing pints in a boiling water bath for 15 minutes) or freeze cooled sauce.
Friday, August 13, 2010
Recipe: BLT Salad with Homemade Blue Cheese Dressing
 What to do when you have an abudnance of tomatoes and just 1 leftover heart of romaine? Well, a BLT sandwich would be my normal answer (assuming you have bacon & bread around...which I always do!), but if most of your tomatoes are in the form of Sungolds, then you've got to rethink things. Thus, the BLT salad was born. I had considered making a ranch dressing for it (for some reason I really think creamy dressing is the way to go here), but I had a hunk of blue cheese leftover from Sprout's meet & greet party.
This salad would have been infinitely more delicious (and seasonal!) with baby mustard greens instead of romaine. I think the peppery bite would cut through the creamy dressing really well.
Homemade Blue Cheese Dressing
Inspired by Ina Garten
- 4 ounces blue cheese, chopped (the stronger the better, IMO. Roquefort would be best. Gorgonzola is a bit mild so add extra if that's all you have on hand)
- 1 cup mayonnaise
- 1 cup heavy cream
- 2 tablespoons cider vinegar (Ina uses tarragon, but I don't have that around)
- 1 teaspoon kosher salt
- 1/2 teaspoon freshly ground black pepper
Thursday, July 22, 2010
Recipe: Peach-Lavender Butter

Fruit butters, of course, don't actually contain butter. This "butter" isn't quite as thick as an apple butter thanks to peach's low pectin, but it's still delicious and would be perfect slathered on a biscuit or inside a crepe.
This recipe comes from Canning & Preserving with Ashley English.
Ingredients (makes about 6 half-pints)
3 lbs peaches
1/3 c water
2 Tbsp fresh or dried lavender (Do not use from craft store. Needs to be edible lavender)
3 Tbsp bottled lemon juice (Important to use bottled instead of fresh as bottled has a consistent acidity)
1.5 Tbsp lemon zest (Important to use as citrus zest provides some of pectin)
3 c granulated sugar
Directions
1. Peel peaches (either by blanching or with a vegetable peeler) and chop.
2. Bring the 1/3 c water to a boil and add lavender. Let steep 15 minutes.
3. Meanwhile wash & sterilize jars and lids.
4. Combine lavender water, peaches, lemon juice & zest in a medium saucepan. Bring to a boil & then reduce heat to a simmer for 15 minutes. Peaches should start to break down and create a thickened sauce.
5. With an immersion blender (or food processor or regular blender), puree peaches until smooth. Cool before hand, if necessary.
6. Add sugar to peach mixture and bring to a boil, stirring to dissolve sugar. Reduce heat to simmer and cook for another 25 minutes.
7. Process in sanitized jars in a boiling water bath for 10 minutes.
Subscribe to:
Posts (Atom)

 Posts
Posts


